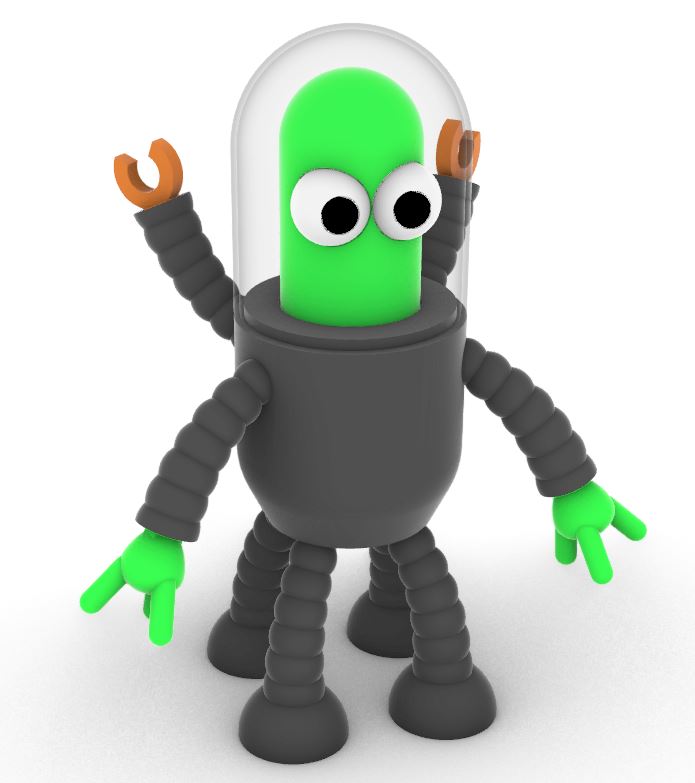
Was browsing FB and saw DIY Electronics announced their Octiman challenge. Happened to have a little free time today, so thought “why not!?”. Had a crack at it and below is my entry. Hope you like it! Hope to see your entries soon too. Look forward to it!
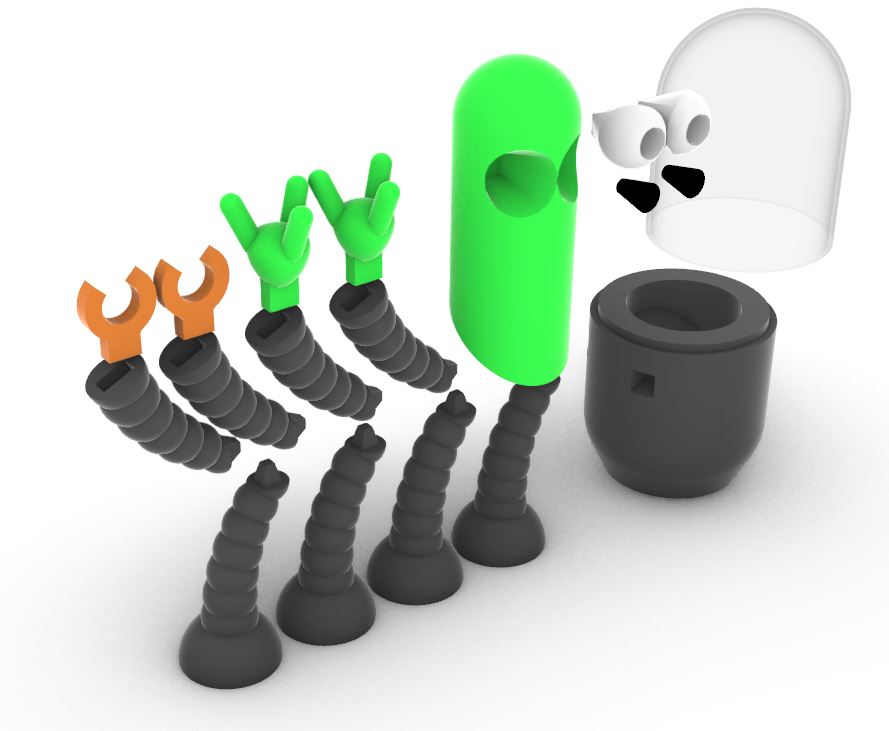
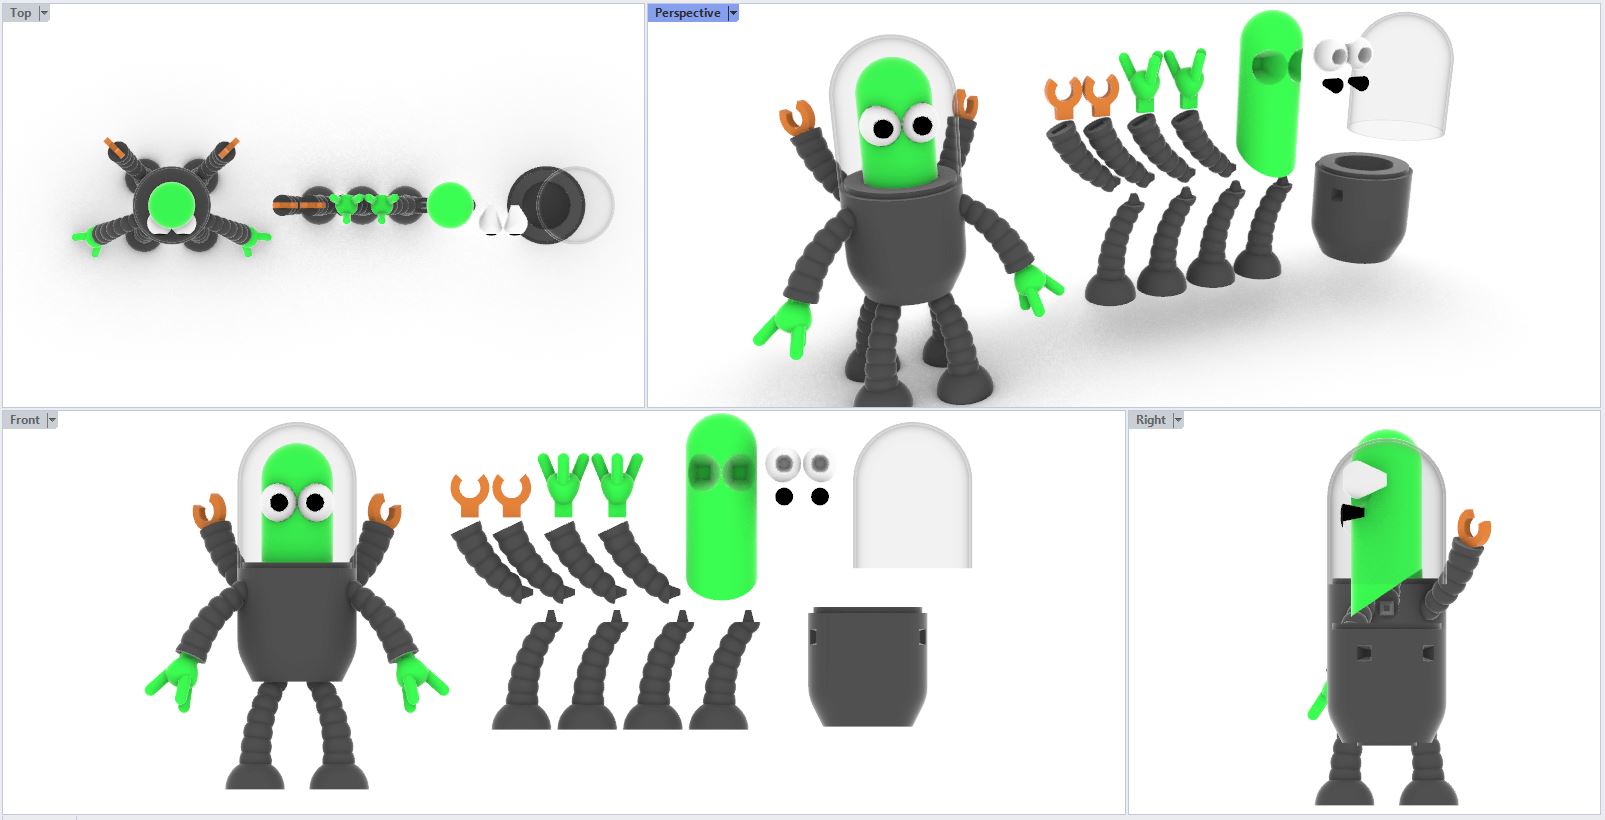
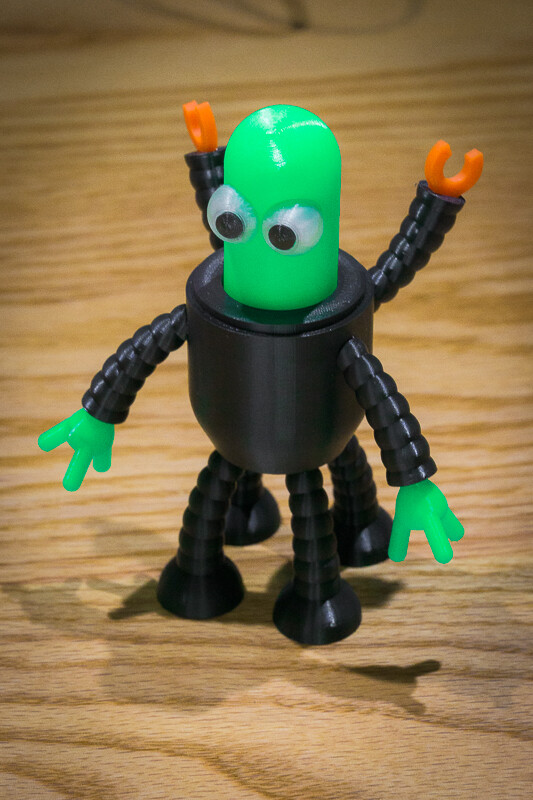
Files are designed to be printed as they are oriented in the supplied files. Parts were designed with no or minimal overhangs so that they should be printable on most FDM printers and will require no support if there is adequate part cooling. Particular attention was paid to make sure both the parts as a whole and the joints between parts will print well on FDM. It is suggested that parts be printed in 0.12mm layer height for both the detail required, and to ensure that parts will fit well. All parts are designed with a part tolerance of 0.4mm to allow them to fit well regardless of the printer they are produced on and will require no post-production. All parts can be assembled with normal super glue (cyanoacrylate).
Did a few test prints to ensure everything works as expected. Final versions are currently printing. I will update here once they are done, assembled and looking pretty.
Video of the assembled parts to give you a better idea
This was my first ever attempt at designing a figure like this. I usually only work on functional and mechanical parts. Not aesthetic parts. What do you think? Cute? Hideous?
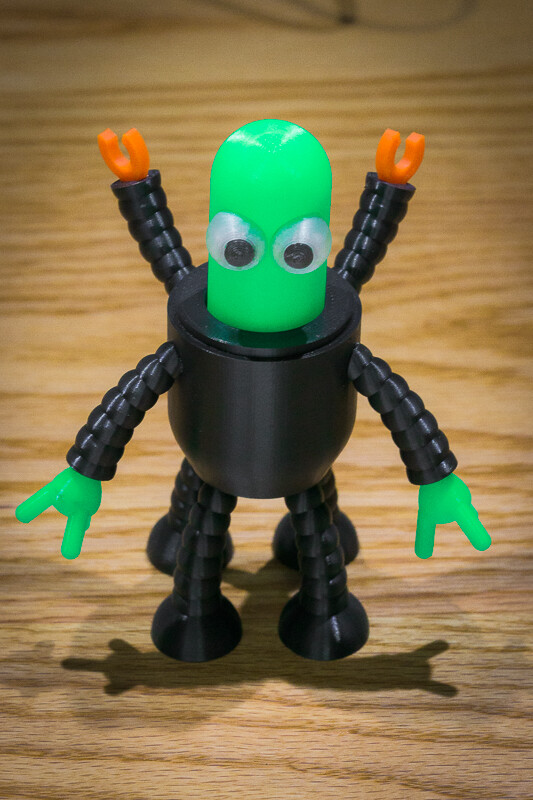
Printing is done, and pretty happy with the results! Tried to match colours as closely as I could with my available filament. Think I got close. Sorry if the images are not the sharpest. Rushed them a bit.
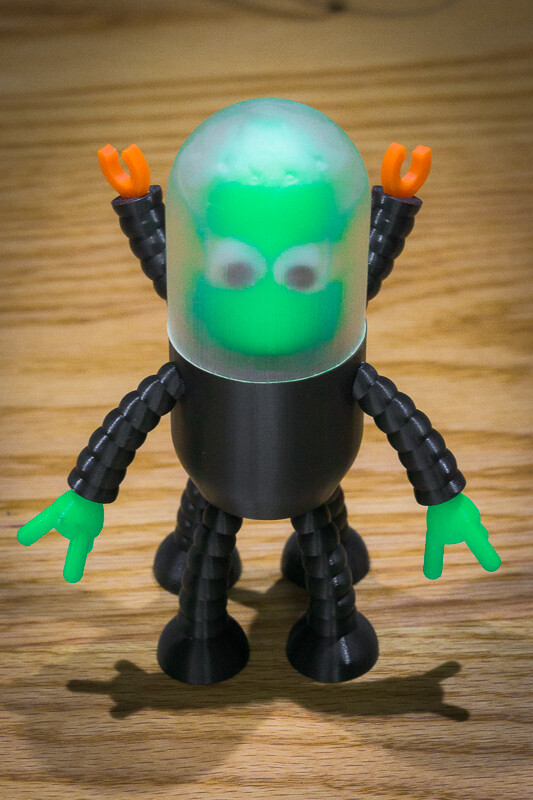
My resin printing skills also require a bit of work. Fairly new to resin. Didn’t come out as clear as I would have liked. Any pro tips on getting clearer results on clear resin prints?
Just for reference, I used Rhinoceros, not Sketchup. Tried Sketchup once or twice, but never got the hang of it. Rhino is a very capable software. Use it for work, so it’s my go-to software for designing stuff.
Wow wow! We are definitely giving this model a go! You’re print came out so clean, well done! Clear resin can be tricky. Results can depend on which brand you use too. But there is a neat trick I’d like try: Paint over a light coating of resin onto the print with a brush and leave it to cure naturally. That’s meant to make it crystal clear. Worth a try if you want to give it a shot
Awesome, thanks! I’ll give it a go! Thanks for the tip.
I used Creality’s Clear, water washable resin for that print. Specifically, with this resin, it seems the water quality has an impact on the final look. I just used regular tap water to wash the prints, but from the few different prints I have done, some of them have come out cloudy, and some came out clear. So suspect either the temperature, chlorine content or ph of the water has an impact on the clarity of the final result. Will have to test with some distilled and reverse osmosis water to confirm.
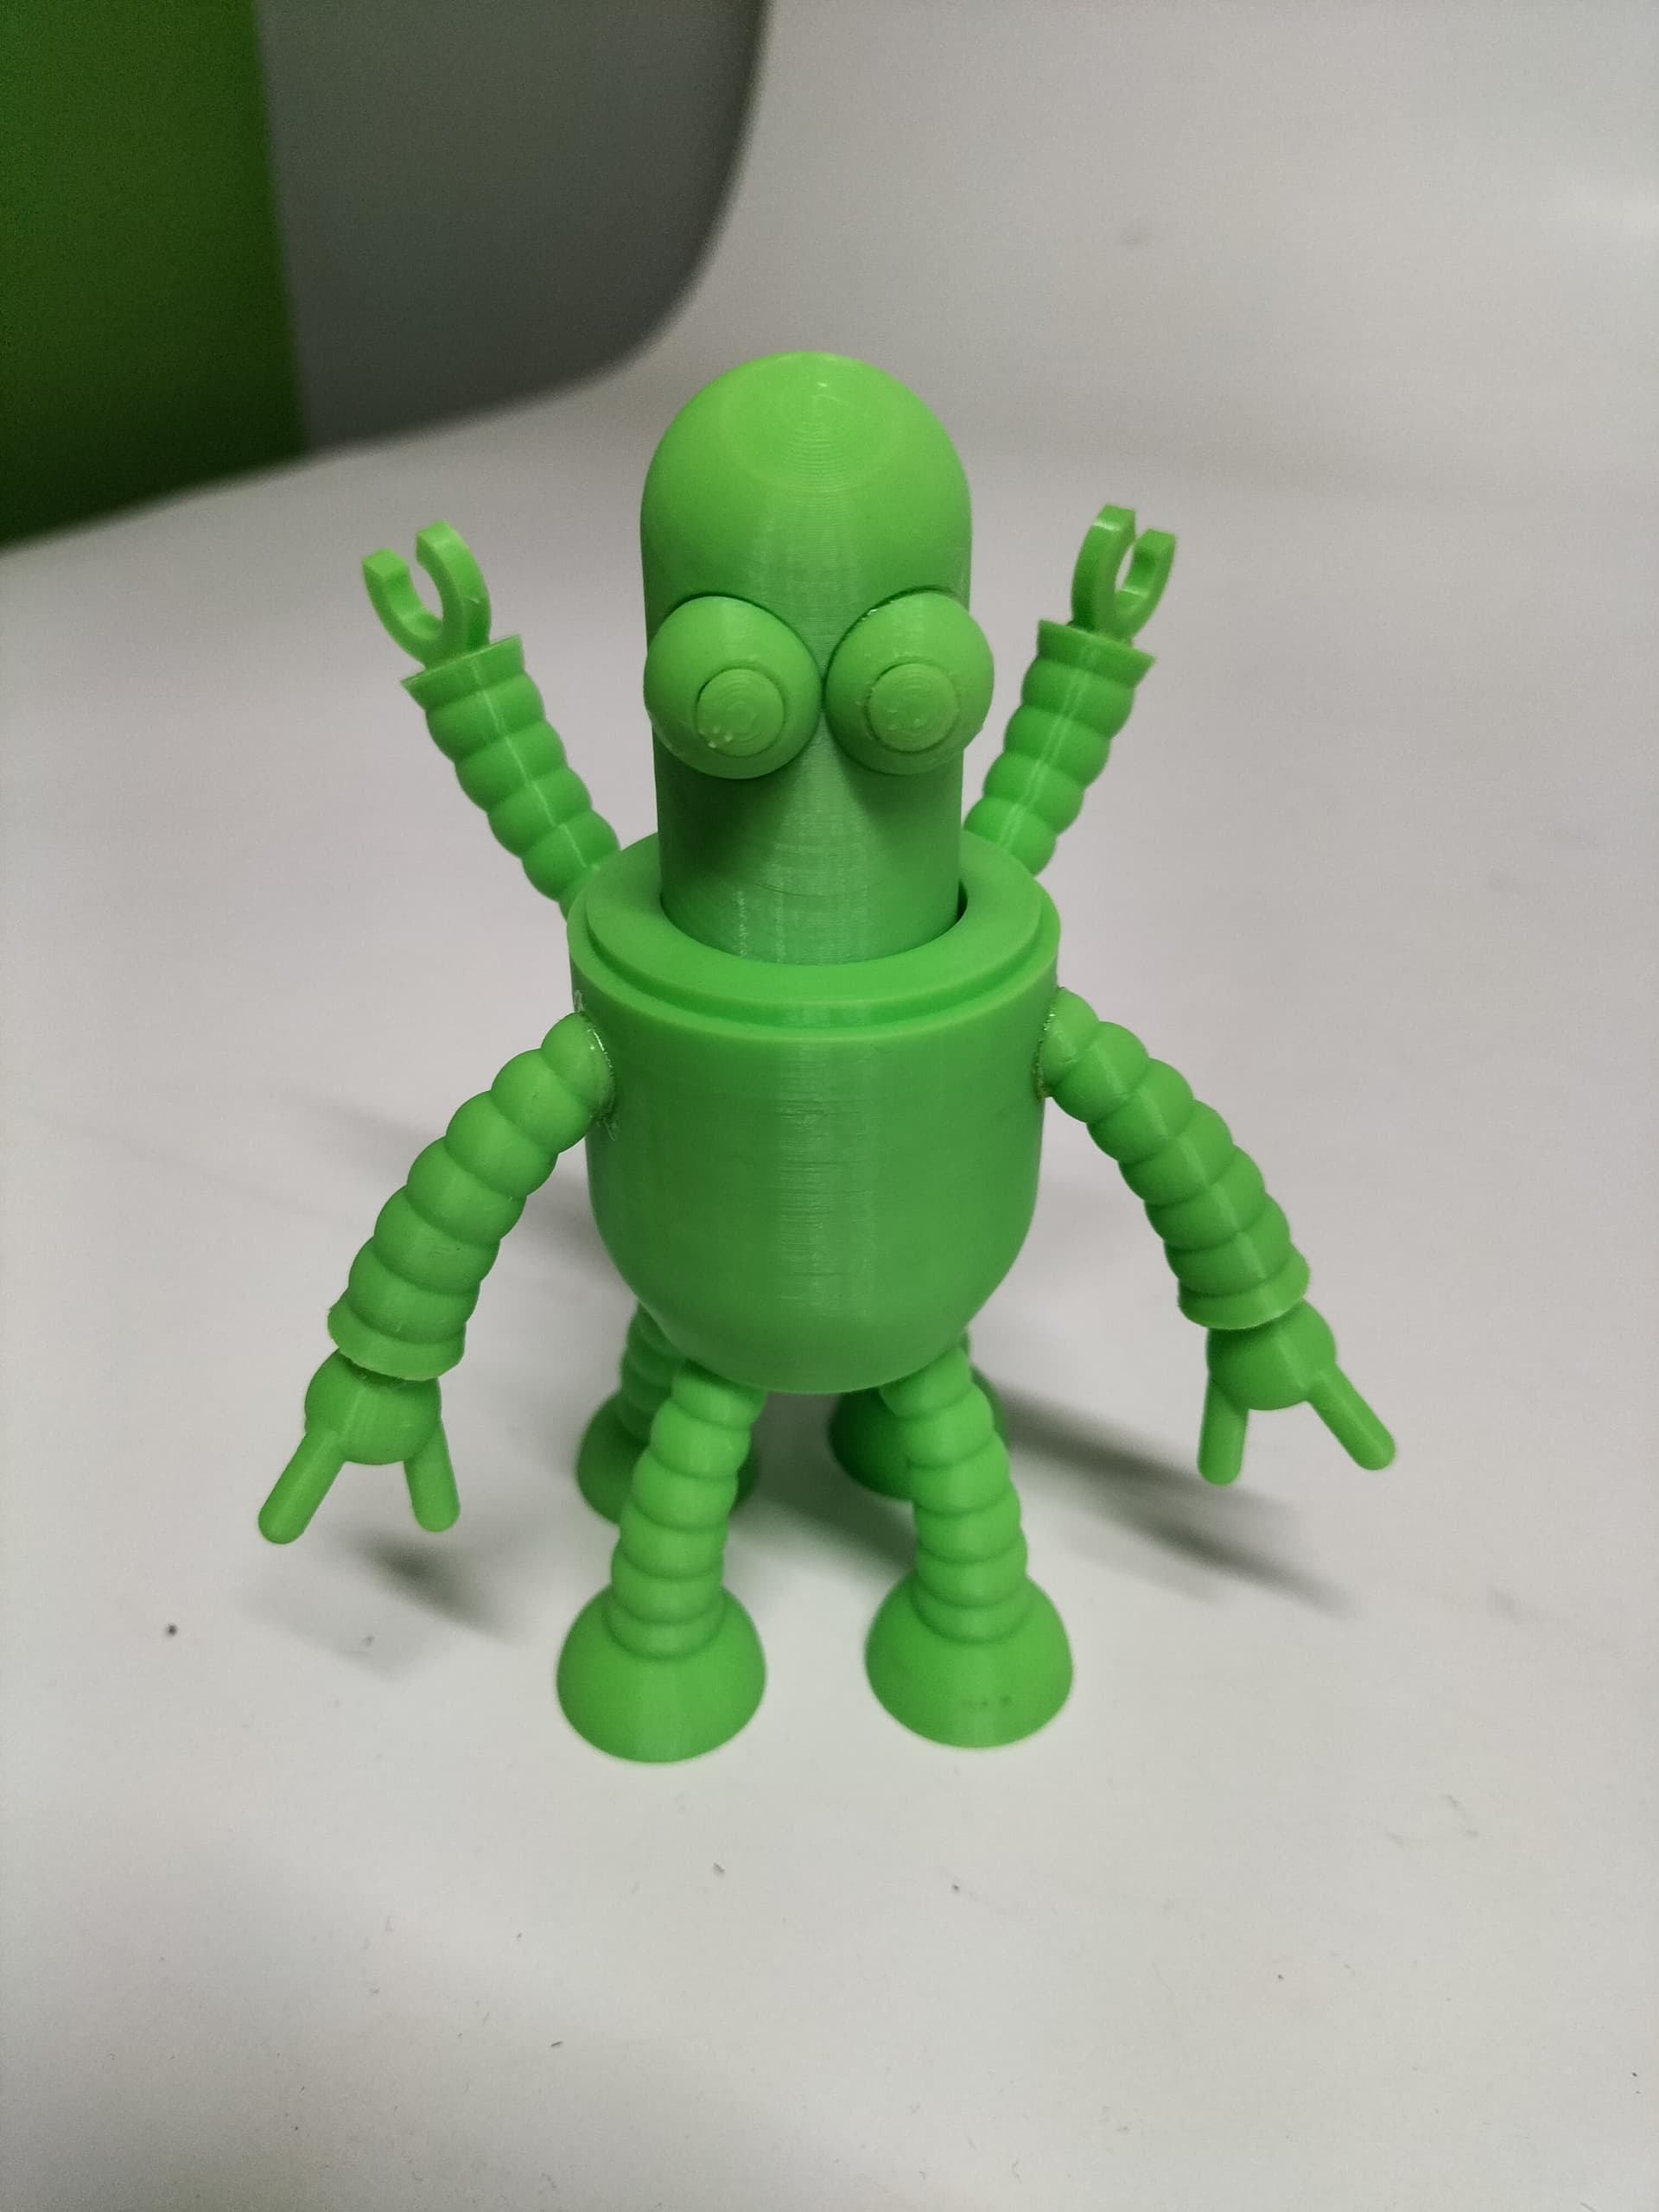
Thanks for the compliments as well. very happy with how clean the print came out as well. After months of tweaking profiles, I think I finally have my PLA profile where I want it.
All the parts printed beautifully without a single support at 0.12mm layers height. Very happy with the design and result. If you do print it out, you will find the tolerances are intended for a machine that isn’t necessarily calibrated perfectly. Everything should print and fit snugly on an “out of box” printer. I assumed DIY Electronics might want to include this file with their printers as the first file to be printed. Could be quite nice for that, as an example print. Fitment tolerance was designed with a 0.2mm gap all around, for 0.4mm of total clearance. The idea was that anyone can print it with no post-production. If you have a very well-tuned printer, fitment might be a little looser but still works perfectly, and assembles just as easily. Will make no functional difference once parts are glued in place.
Let me know if I can send you the files. Give it a go. Look forward to seeing your results!
Beginning a test print as we speak (benefits of working at DIY. But you are welcome to share your STLs for others to try it out too)
Ohh, water washable is great. I admit, personally I am new to resin as well but I am in love with the details. Need to practice more resin printing in the near future. We should definitely swap tips in the #3d-printing:dlp-printing channel sometime, like let me know how that washing test goes.
Awesome to hear how thought out your model is xD I’ll post the test when all the pieces are finished! This first one will have to be one colour for testing unfortunately, just so we can compare all the entries equally to begin with.
Hehehe. I assumed from your avatar you might already have them. Very nice drawing on FB today! Good job!
I’ll gladly share as I learn stuff. Fortunately it seems resin does not have nearly as steep a learning curve as FDM. Managed my first couple of prints with no screaming, shouting or rage-quitting.
Look forward to hearing your feedback once you’ve finished the print. Let me know what you think, or if there is anything that could be better. Always eager to learn.