A new Hero is born! Behold, Octiman!
Here to make all your late night prints that much cooler. Artistic Render
Greetings!
Hope everyone is doing well, if not, hopefully this post will cheer you up a bit. ![]()
It is with great pleasure that I introduce you to my entry for the Octiman giveaway. Character and stylized design isn’t my forte and my experience with 3D printing is super limited, but an honest attempt to make a character that is also printable none the less. ![]()
So with that said, I have tons to show, and hopefully you guys like it as much as I enjoyed making him. Hopefully I did Octiman justice.
For those interested, I would like to share some details on the character’s design and what I did for this entry, covering both the rendered character as well as the 3D printable model.
I’ll include images to make this jaw dropping wall of text less boring to read. ![]()
The Design:
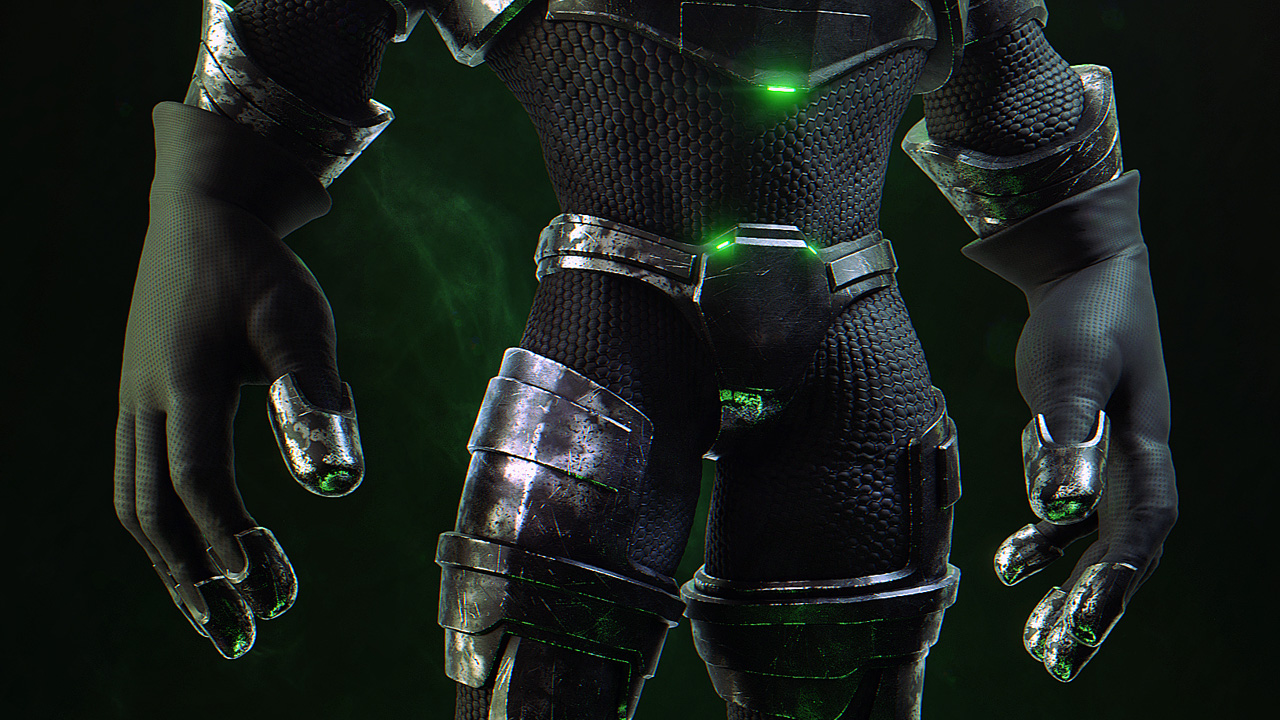
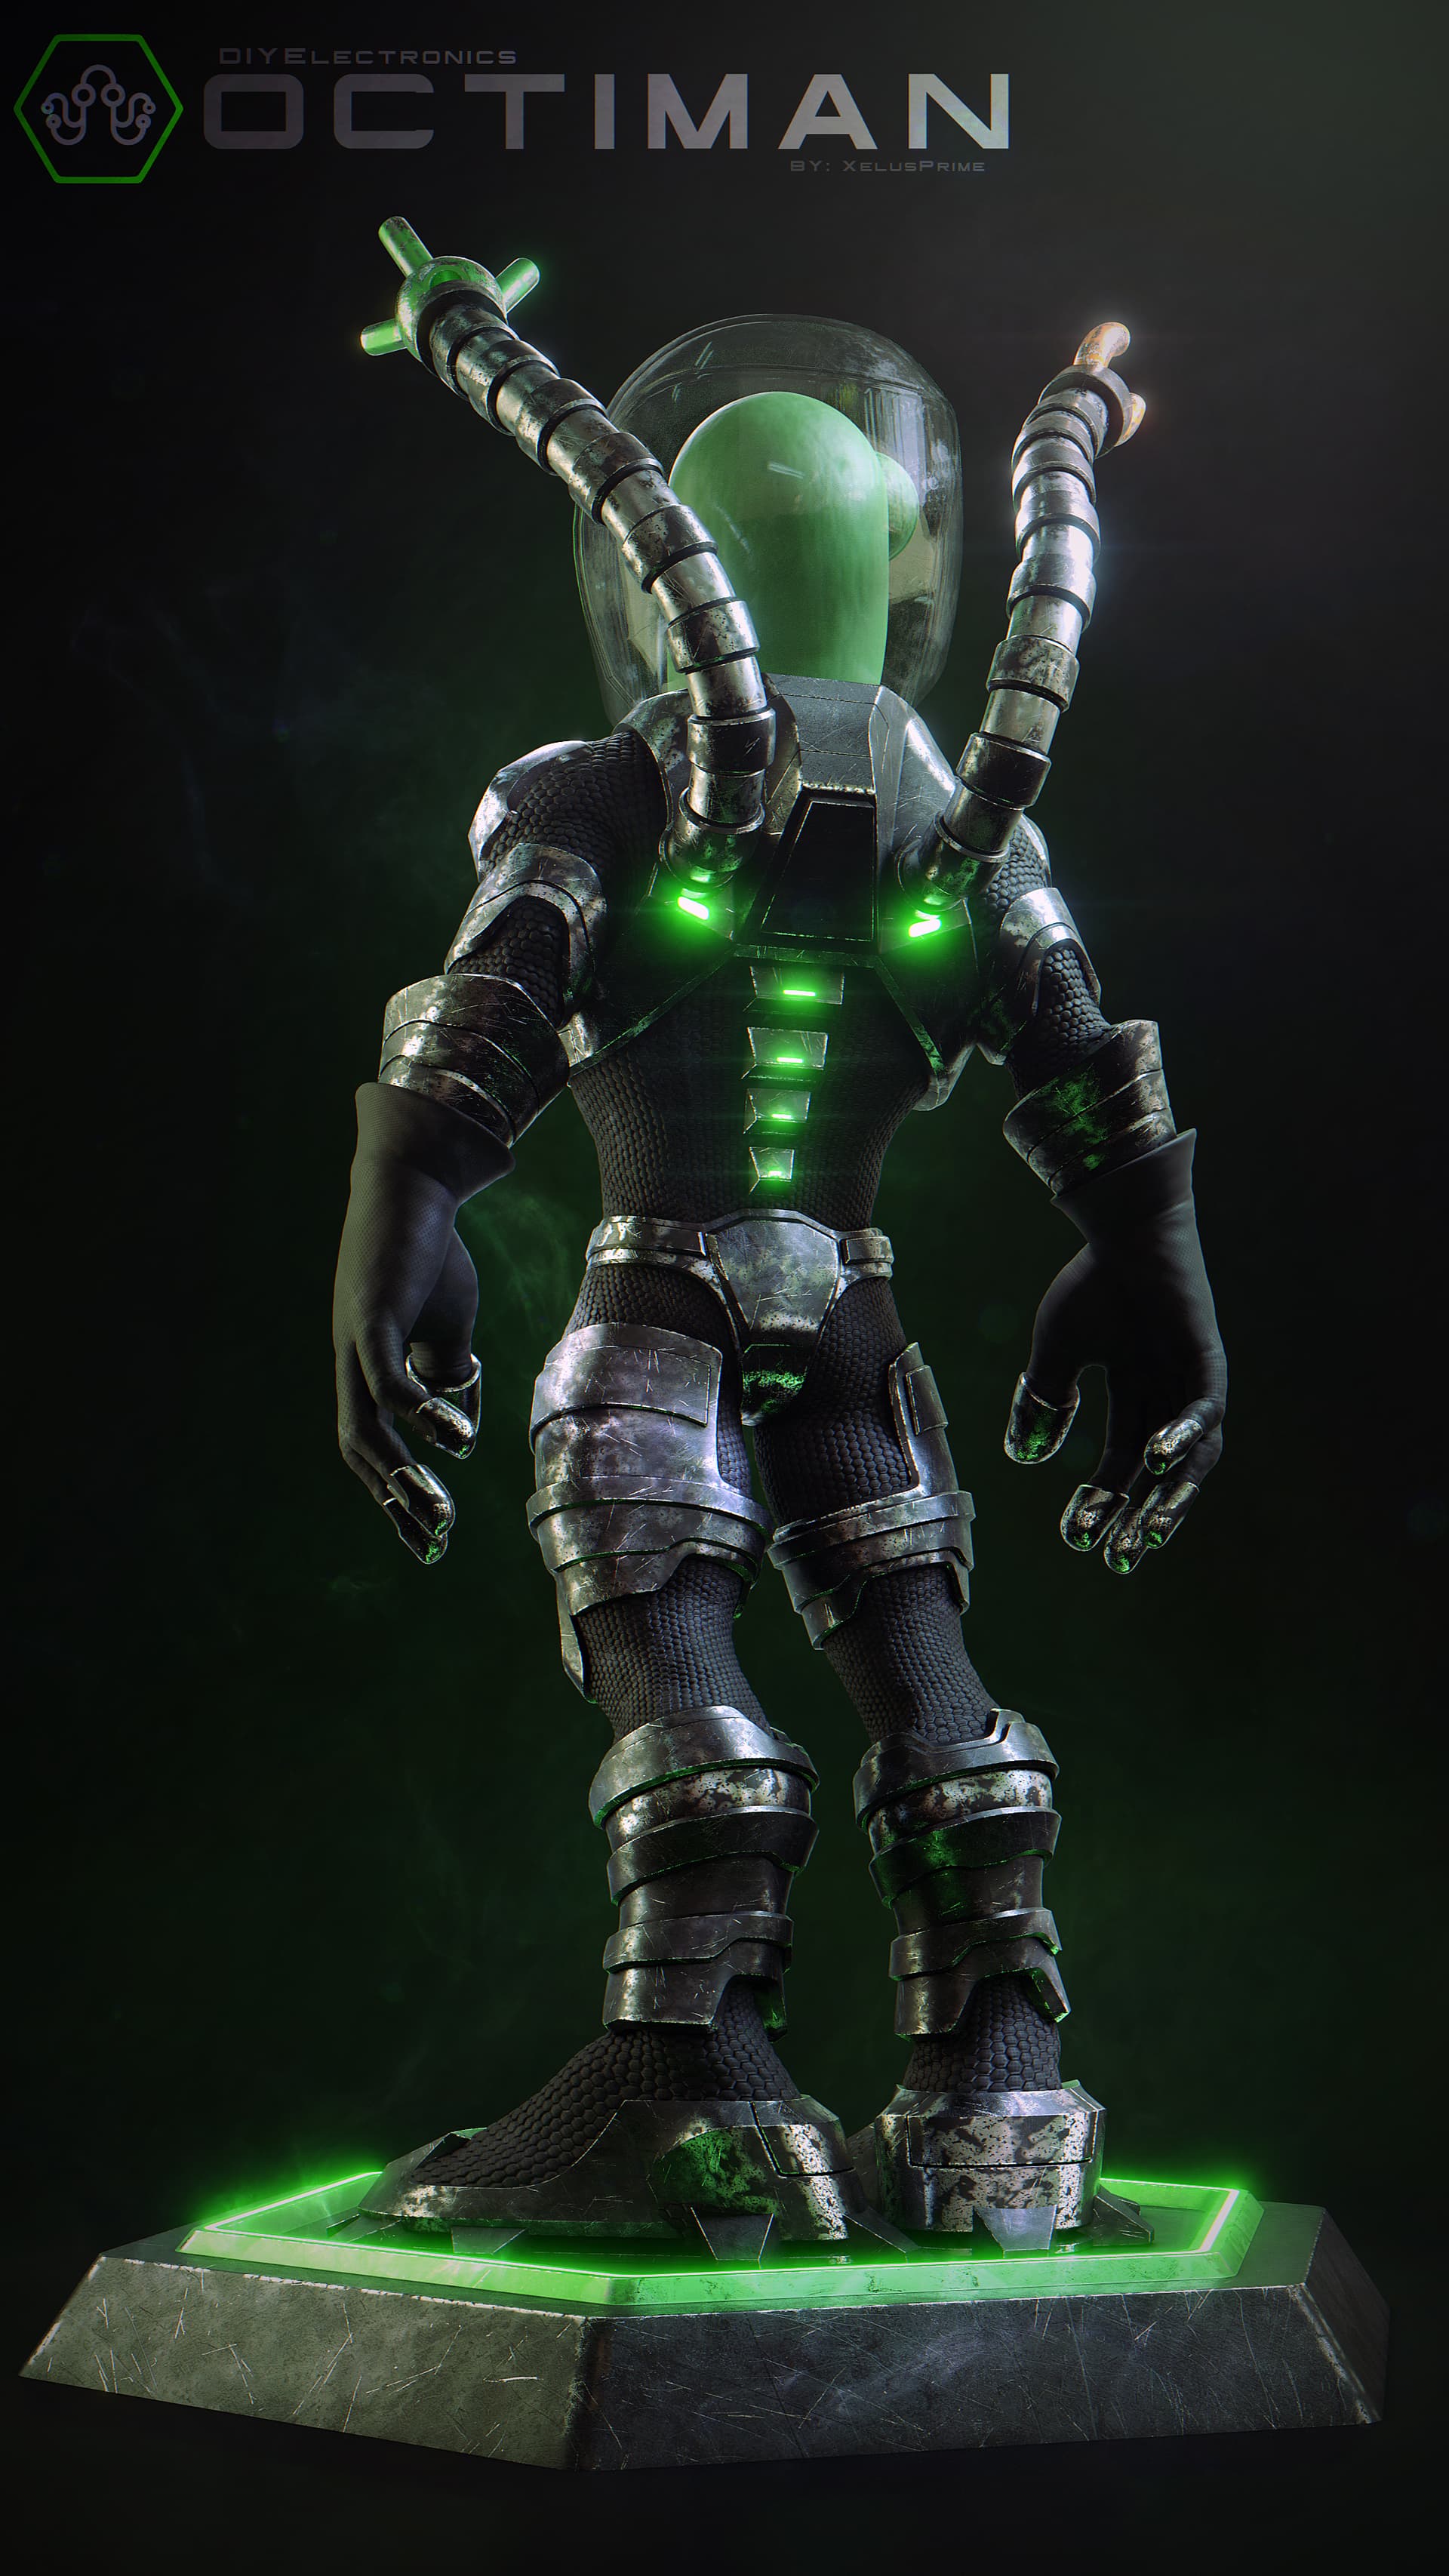
The general approach for making this version of Octiman was mainly inspired by the Hexagon shape of the DIYE logo as well giving the reference character an “upgrade” on the ol suit. In particular, the chest “armor” was designed around the logo itself, as well as the base on which Octiman stands. In addition, on the rendered version of the original character atleast, his “Techsuit” also makes use of the Hexagonal shapes to also help with both the sci-fi appearance as well as keeping with the logo’s shape. A few other “subtle” elements were also used, such as the hexagonal “bokeh” in the teaser image of the character.
Chest design
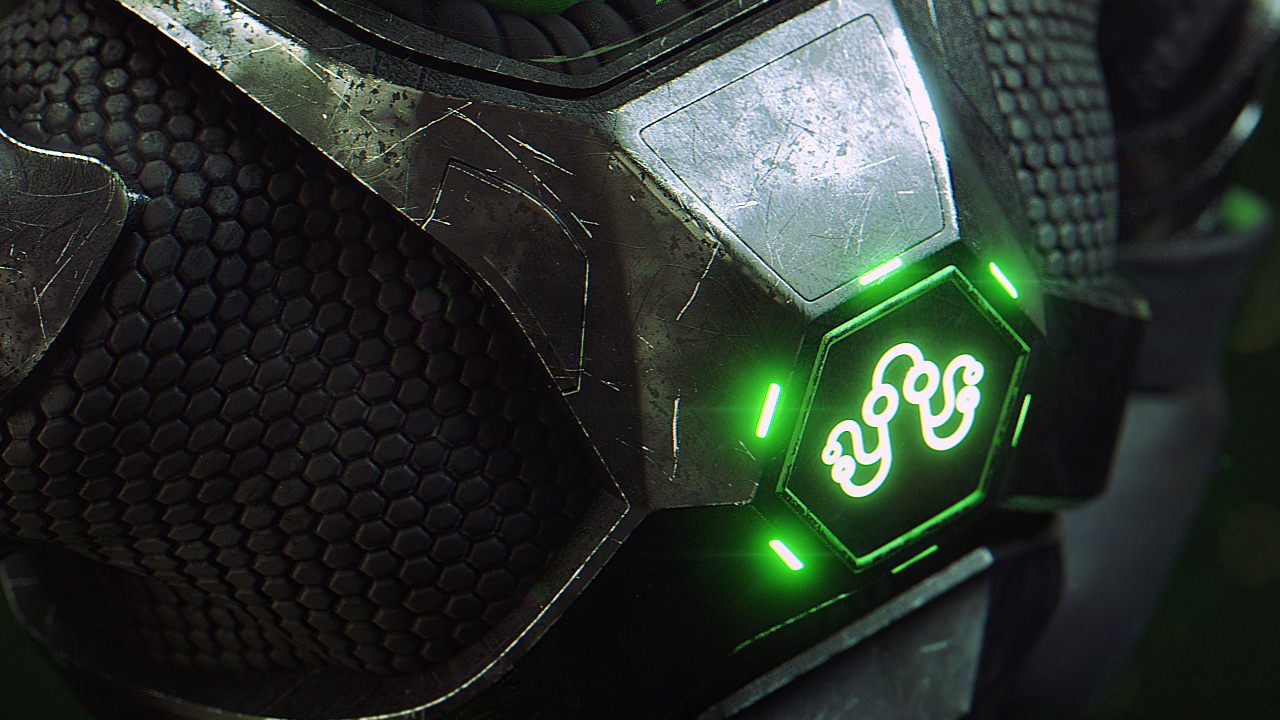
DIYE Logo Hexagon shape used on the chest as the center influence of the chest armor. Artistic Render
Base Design
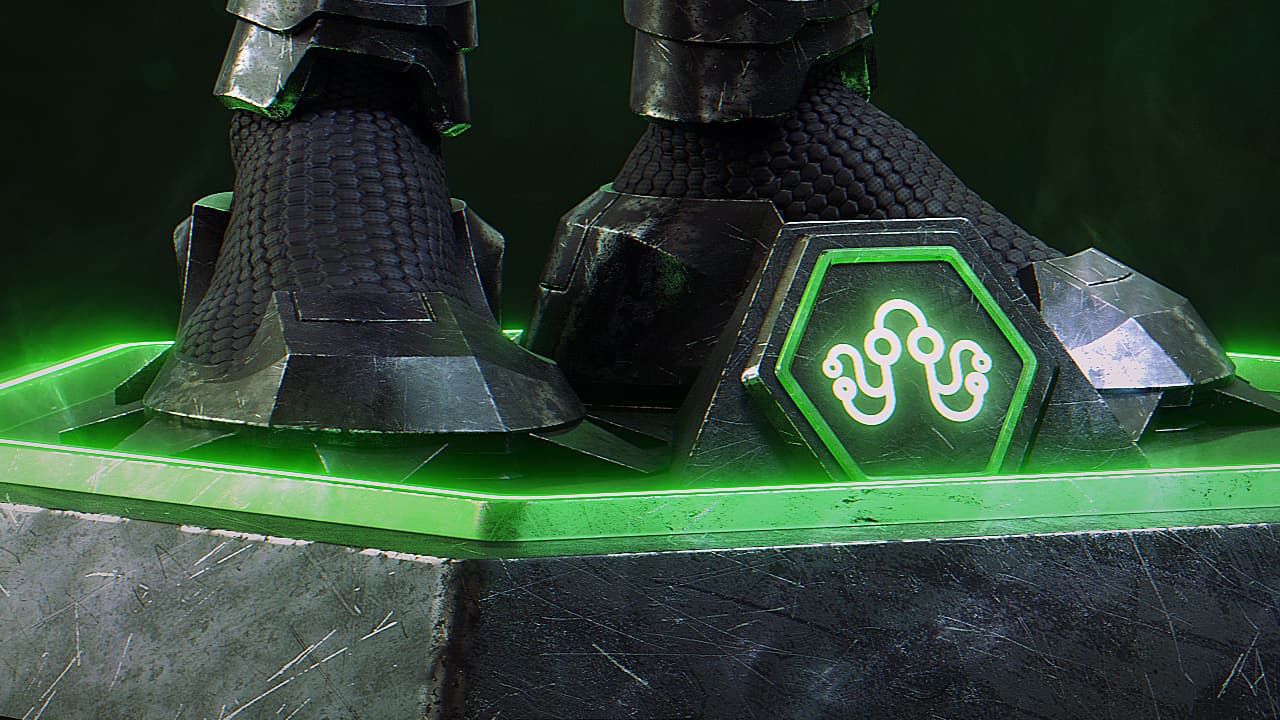
Octiman stands on the hexagon of the DIYE logo, plus a small one in front of him, for presentation. Artistic Render
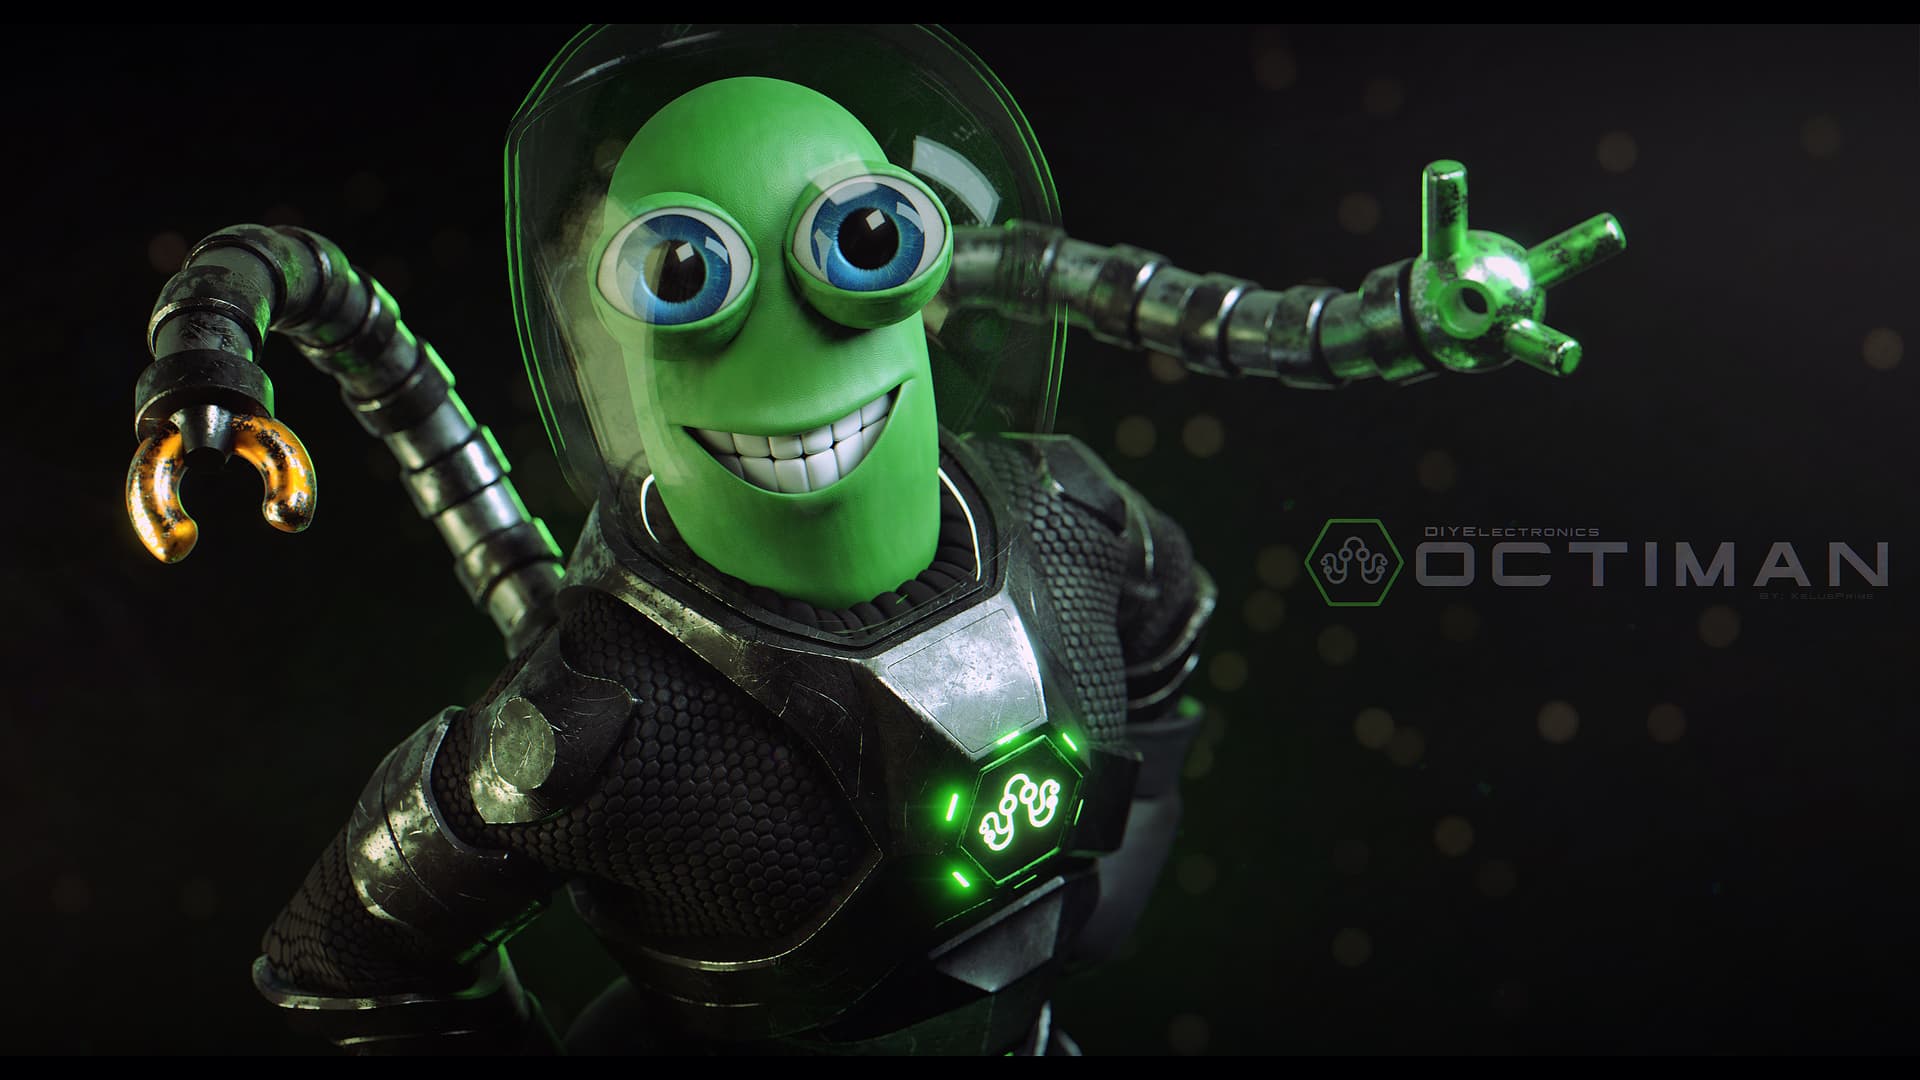
Since the reference image was a bit more light hearted and “stylized” in nature, I thought it would only be appropriate to keep to that notion as far as the character’s proportions and facial appearance is concerned, and keep details to a minimum, at least, far less than what I usually model and render. ![]() Even less on the actual 3D printable model.
Even less on the actual 3D printable model.
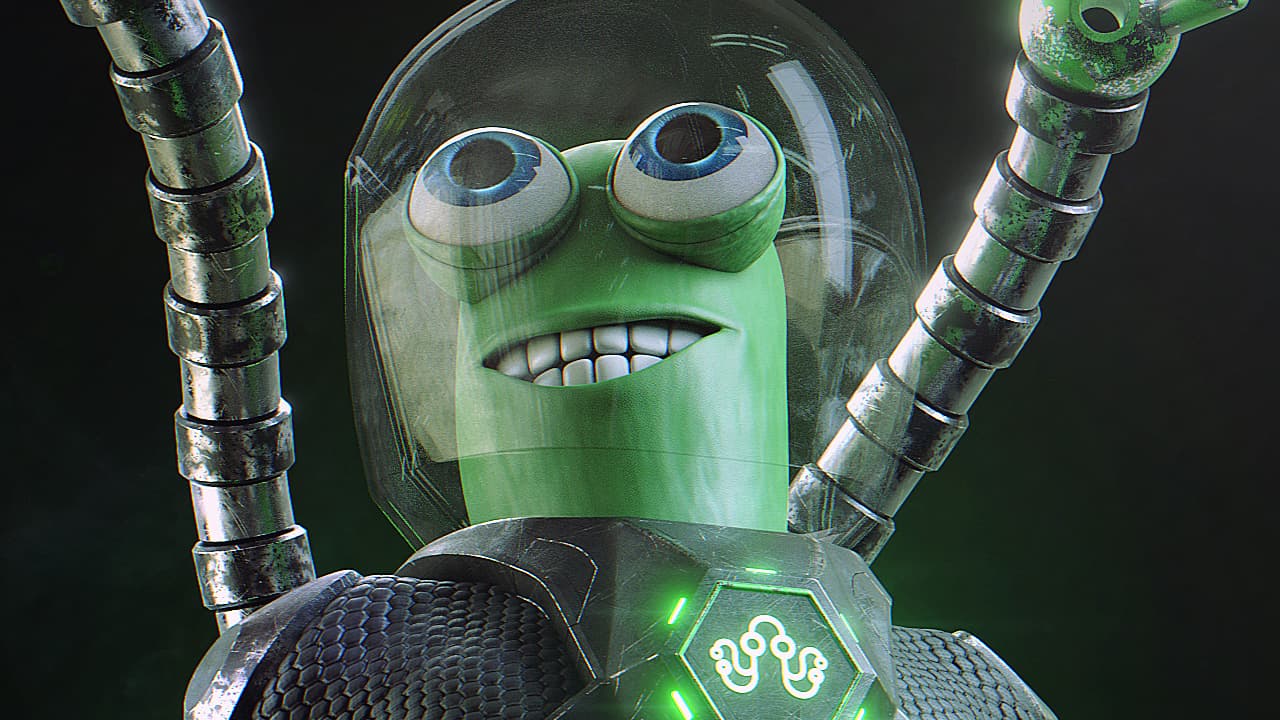
Big eyes, even bigger smile. Artistic Render “That would make even Colgate jealous.”
Even bigger hands. Artistic Render
The Models
Due to my lack of 3D printing experience, two different models were designed. The first of which was designed as the actual character, this model is rigged and animated for all of the “Artistic” renders and it is from this model that the 2nd model was made to be printable. To play it on the safe side, some good advice from a fellow forum member suggested to keep it a bit more “simple”, in light of this, I’ve removed a lot of the smaller details seen on the actual character, from the 3D printable model, this was done to hopefully help in making the model more practically printable, and easier to work with for printing. I hope it does actually help. ![]()
3D Printable Model: Modeled at a print scale of 10cm or bigger
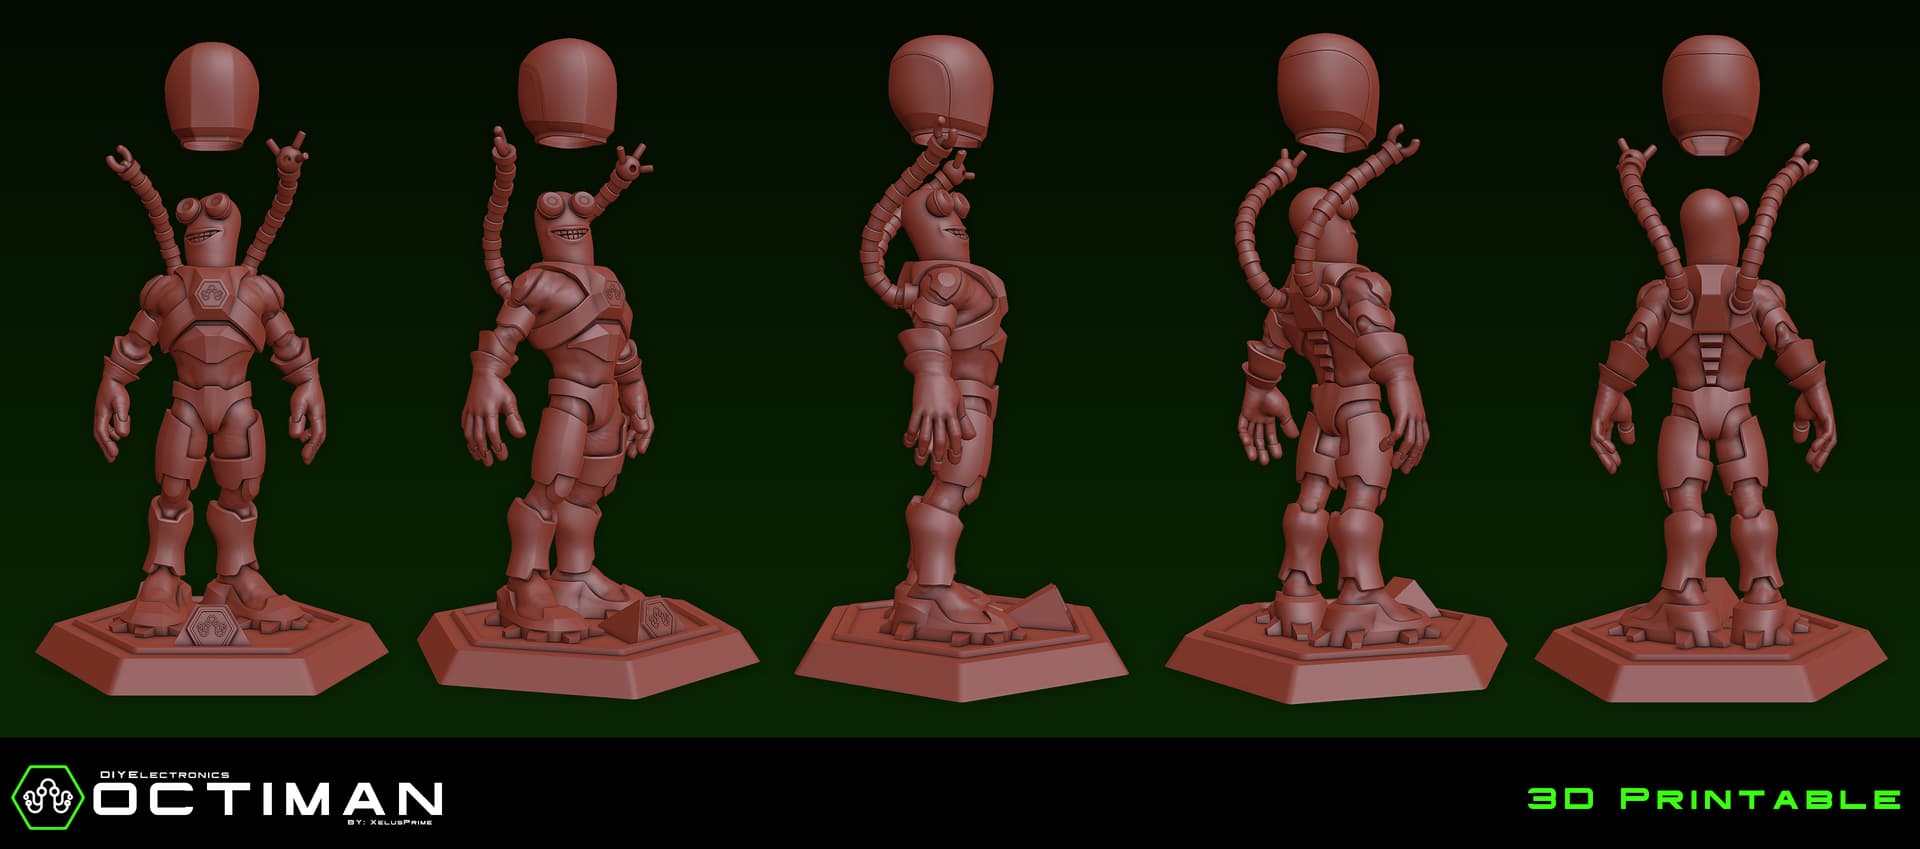
Much more basic in detail, without venturing too far away from the character’s original design, but an attempt to make it more practical and reasonable to print.
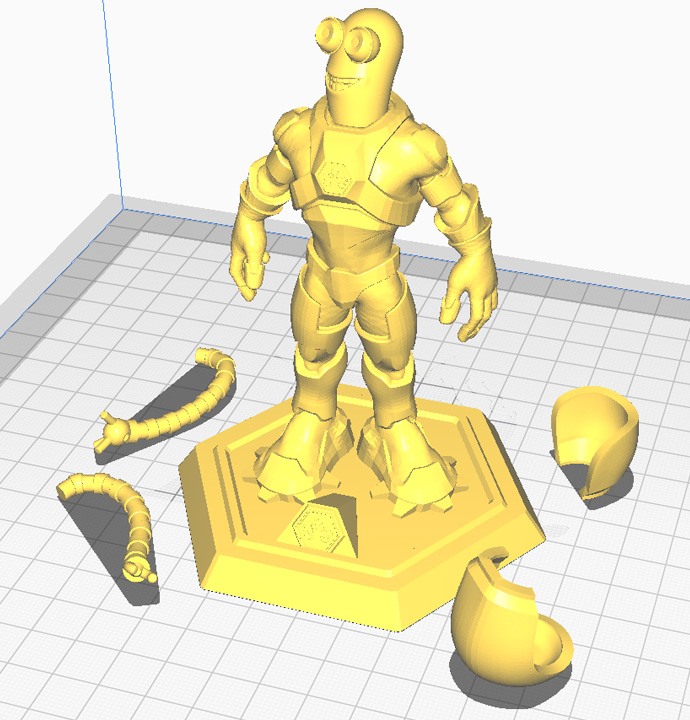
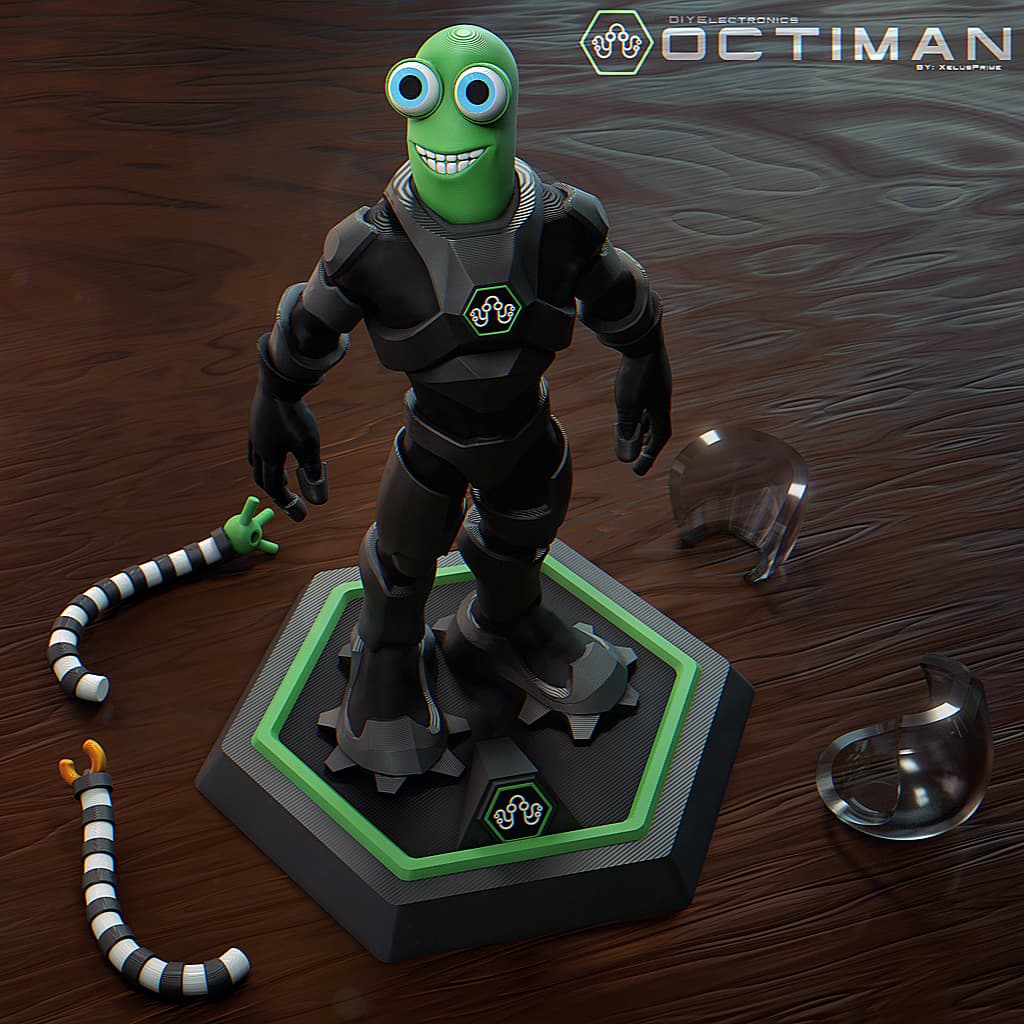
In the slicer for 3D Printing. Tentacles are separate, and the glass helmet was split to make it slightly easier to fit around his head with those giant eyeballs.
Front view of the 3D Printable, haven’t been assembled. Mockup render. Feet and legs were made bigger to give proper support for the slightly larger upper body and hands.
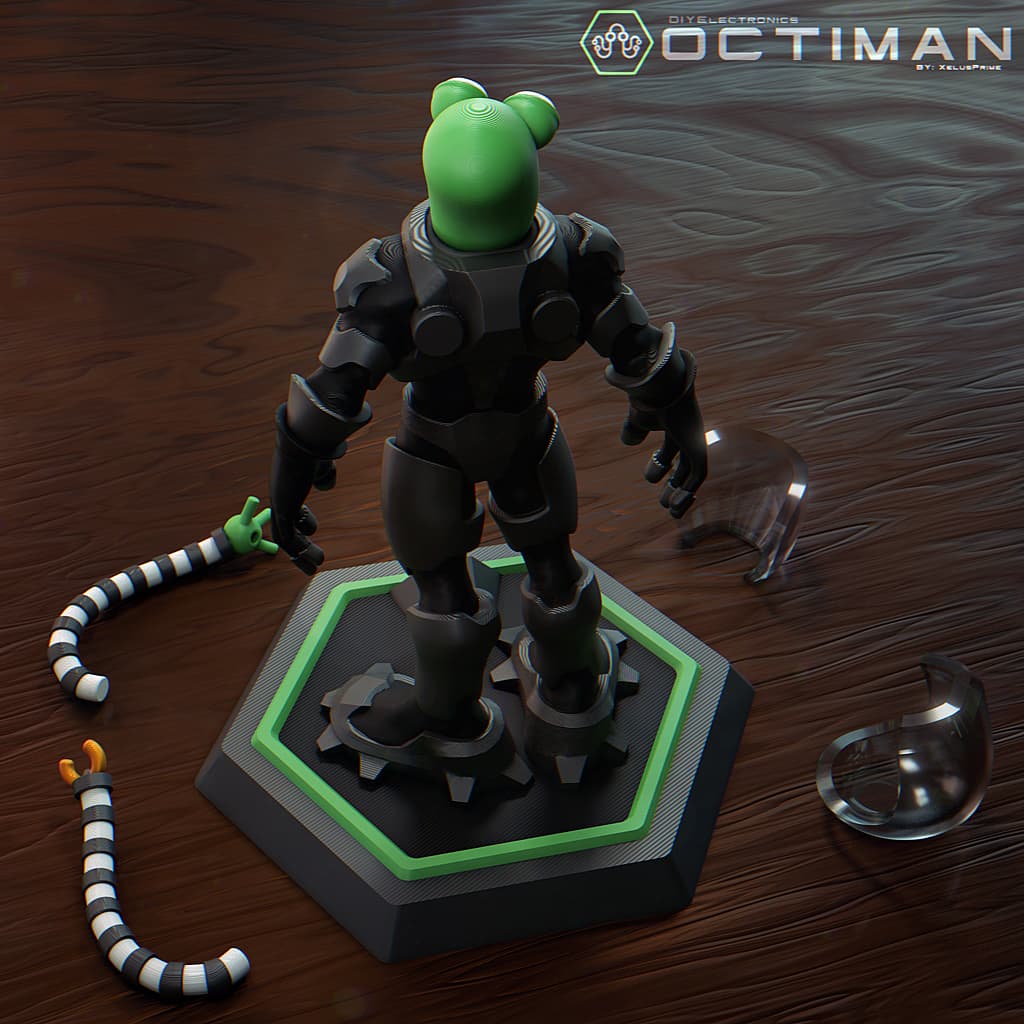
Back view of the 3D Printable, haven’t been assembled. Mockup render.
Original Character Model:
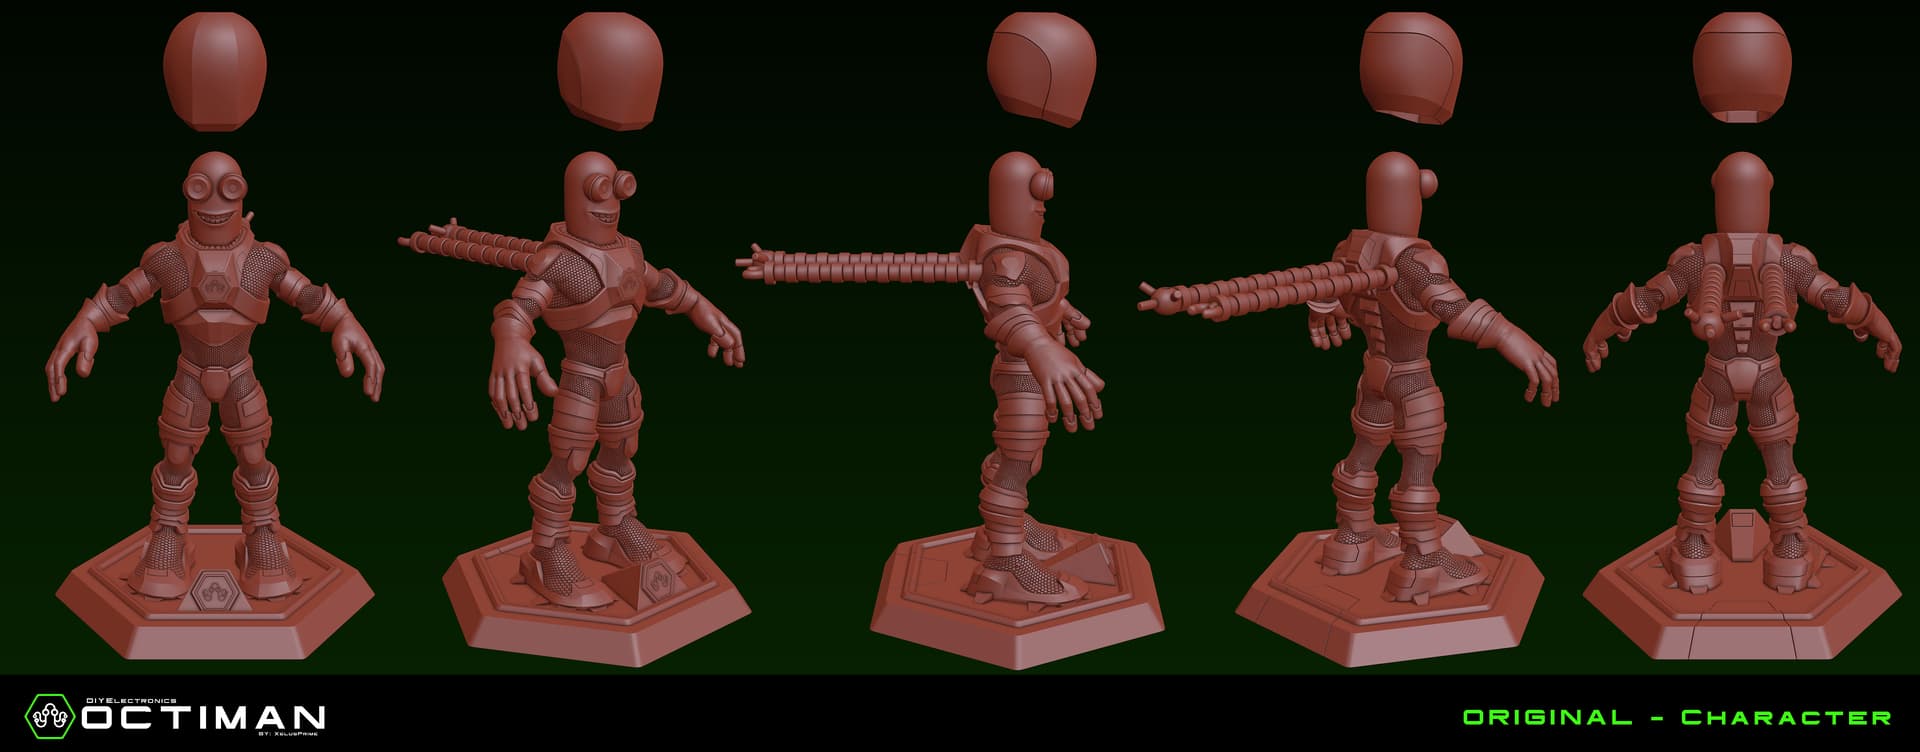
Original Character that the 3D Printable is based on. Set in his “A” biped pose.
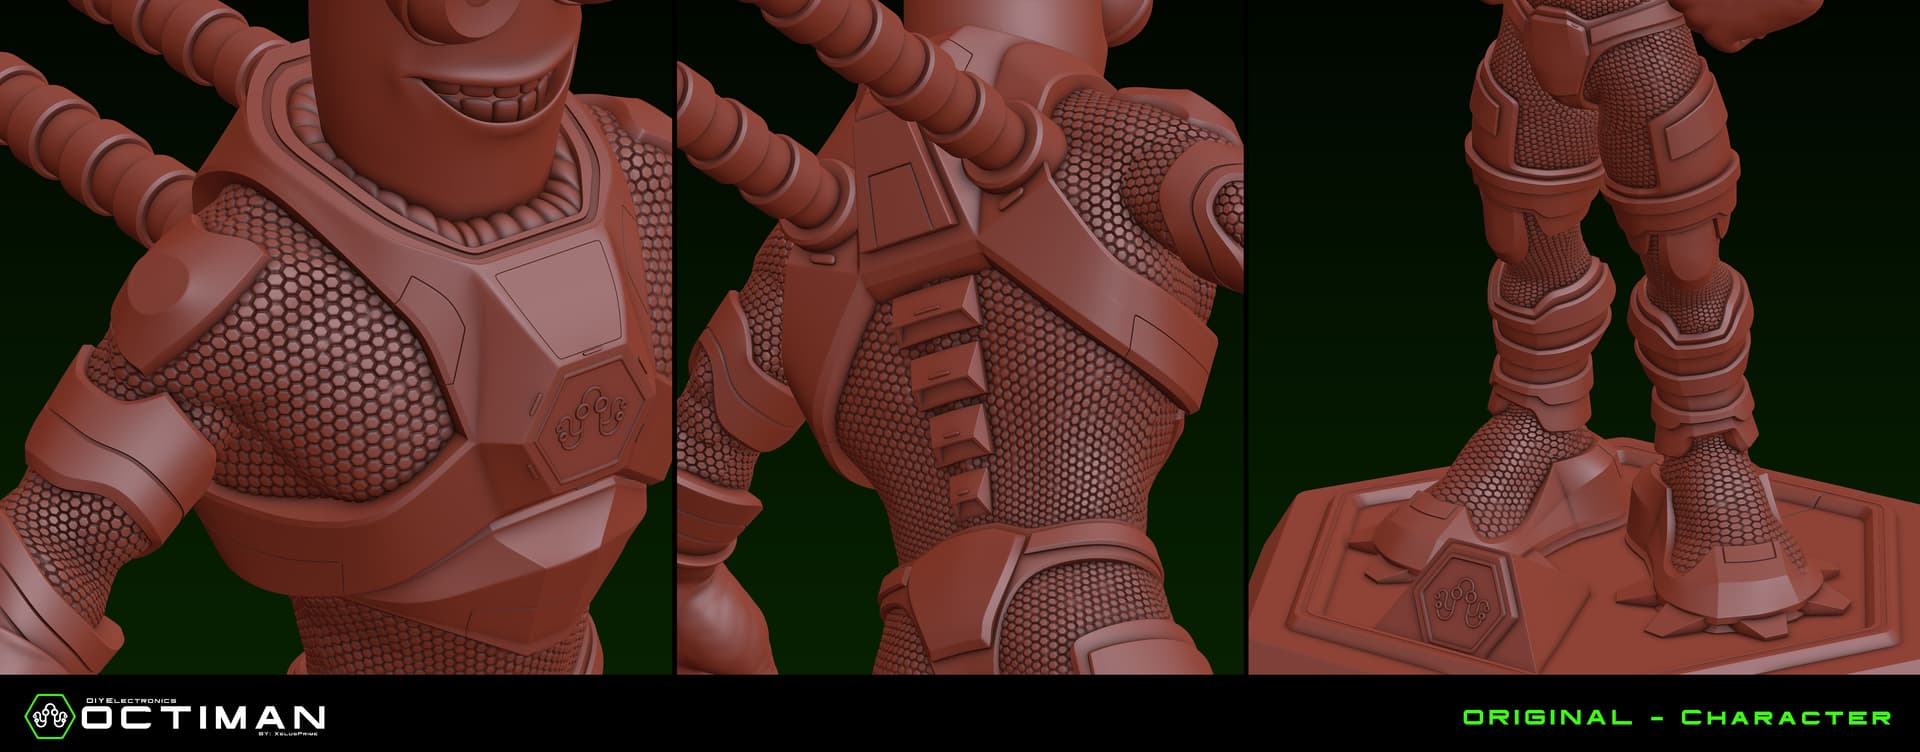
Closer view of the character’s model, yip, the techsuit’s pattern is actual model, not a flat texture, I like to rely on model details more than textures in general. My GPU hates me for it, but here we are.
The Renders “This is my jam…” ![]()
They didn’t specify “what” type of renders it should be, so… Something I have a lot more experience in. ![]() I figured, instead of just making a simple 3D printable model of a sculpted or poly modeled lifeless character, I wanted to give my Octiman some “life”. Despite being a “stylized” character, I wanted to portray Octiman as an epic Hero. So for both the model’s pose and the Artistic Renders that was the sole focus:
I figured, instead of just making a simple 3D printable model of a sculpted or poly modeled lifeless character, I wanted to give my Octiman some “life”. Despite being a “stylized” character, I wanted to portray Octiman as an epic Hero. So for both the model’s pose and the Artistic Renders that was the sole focus:
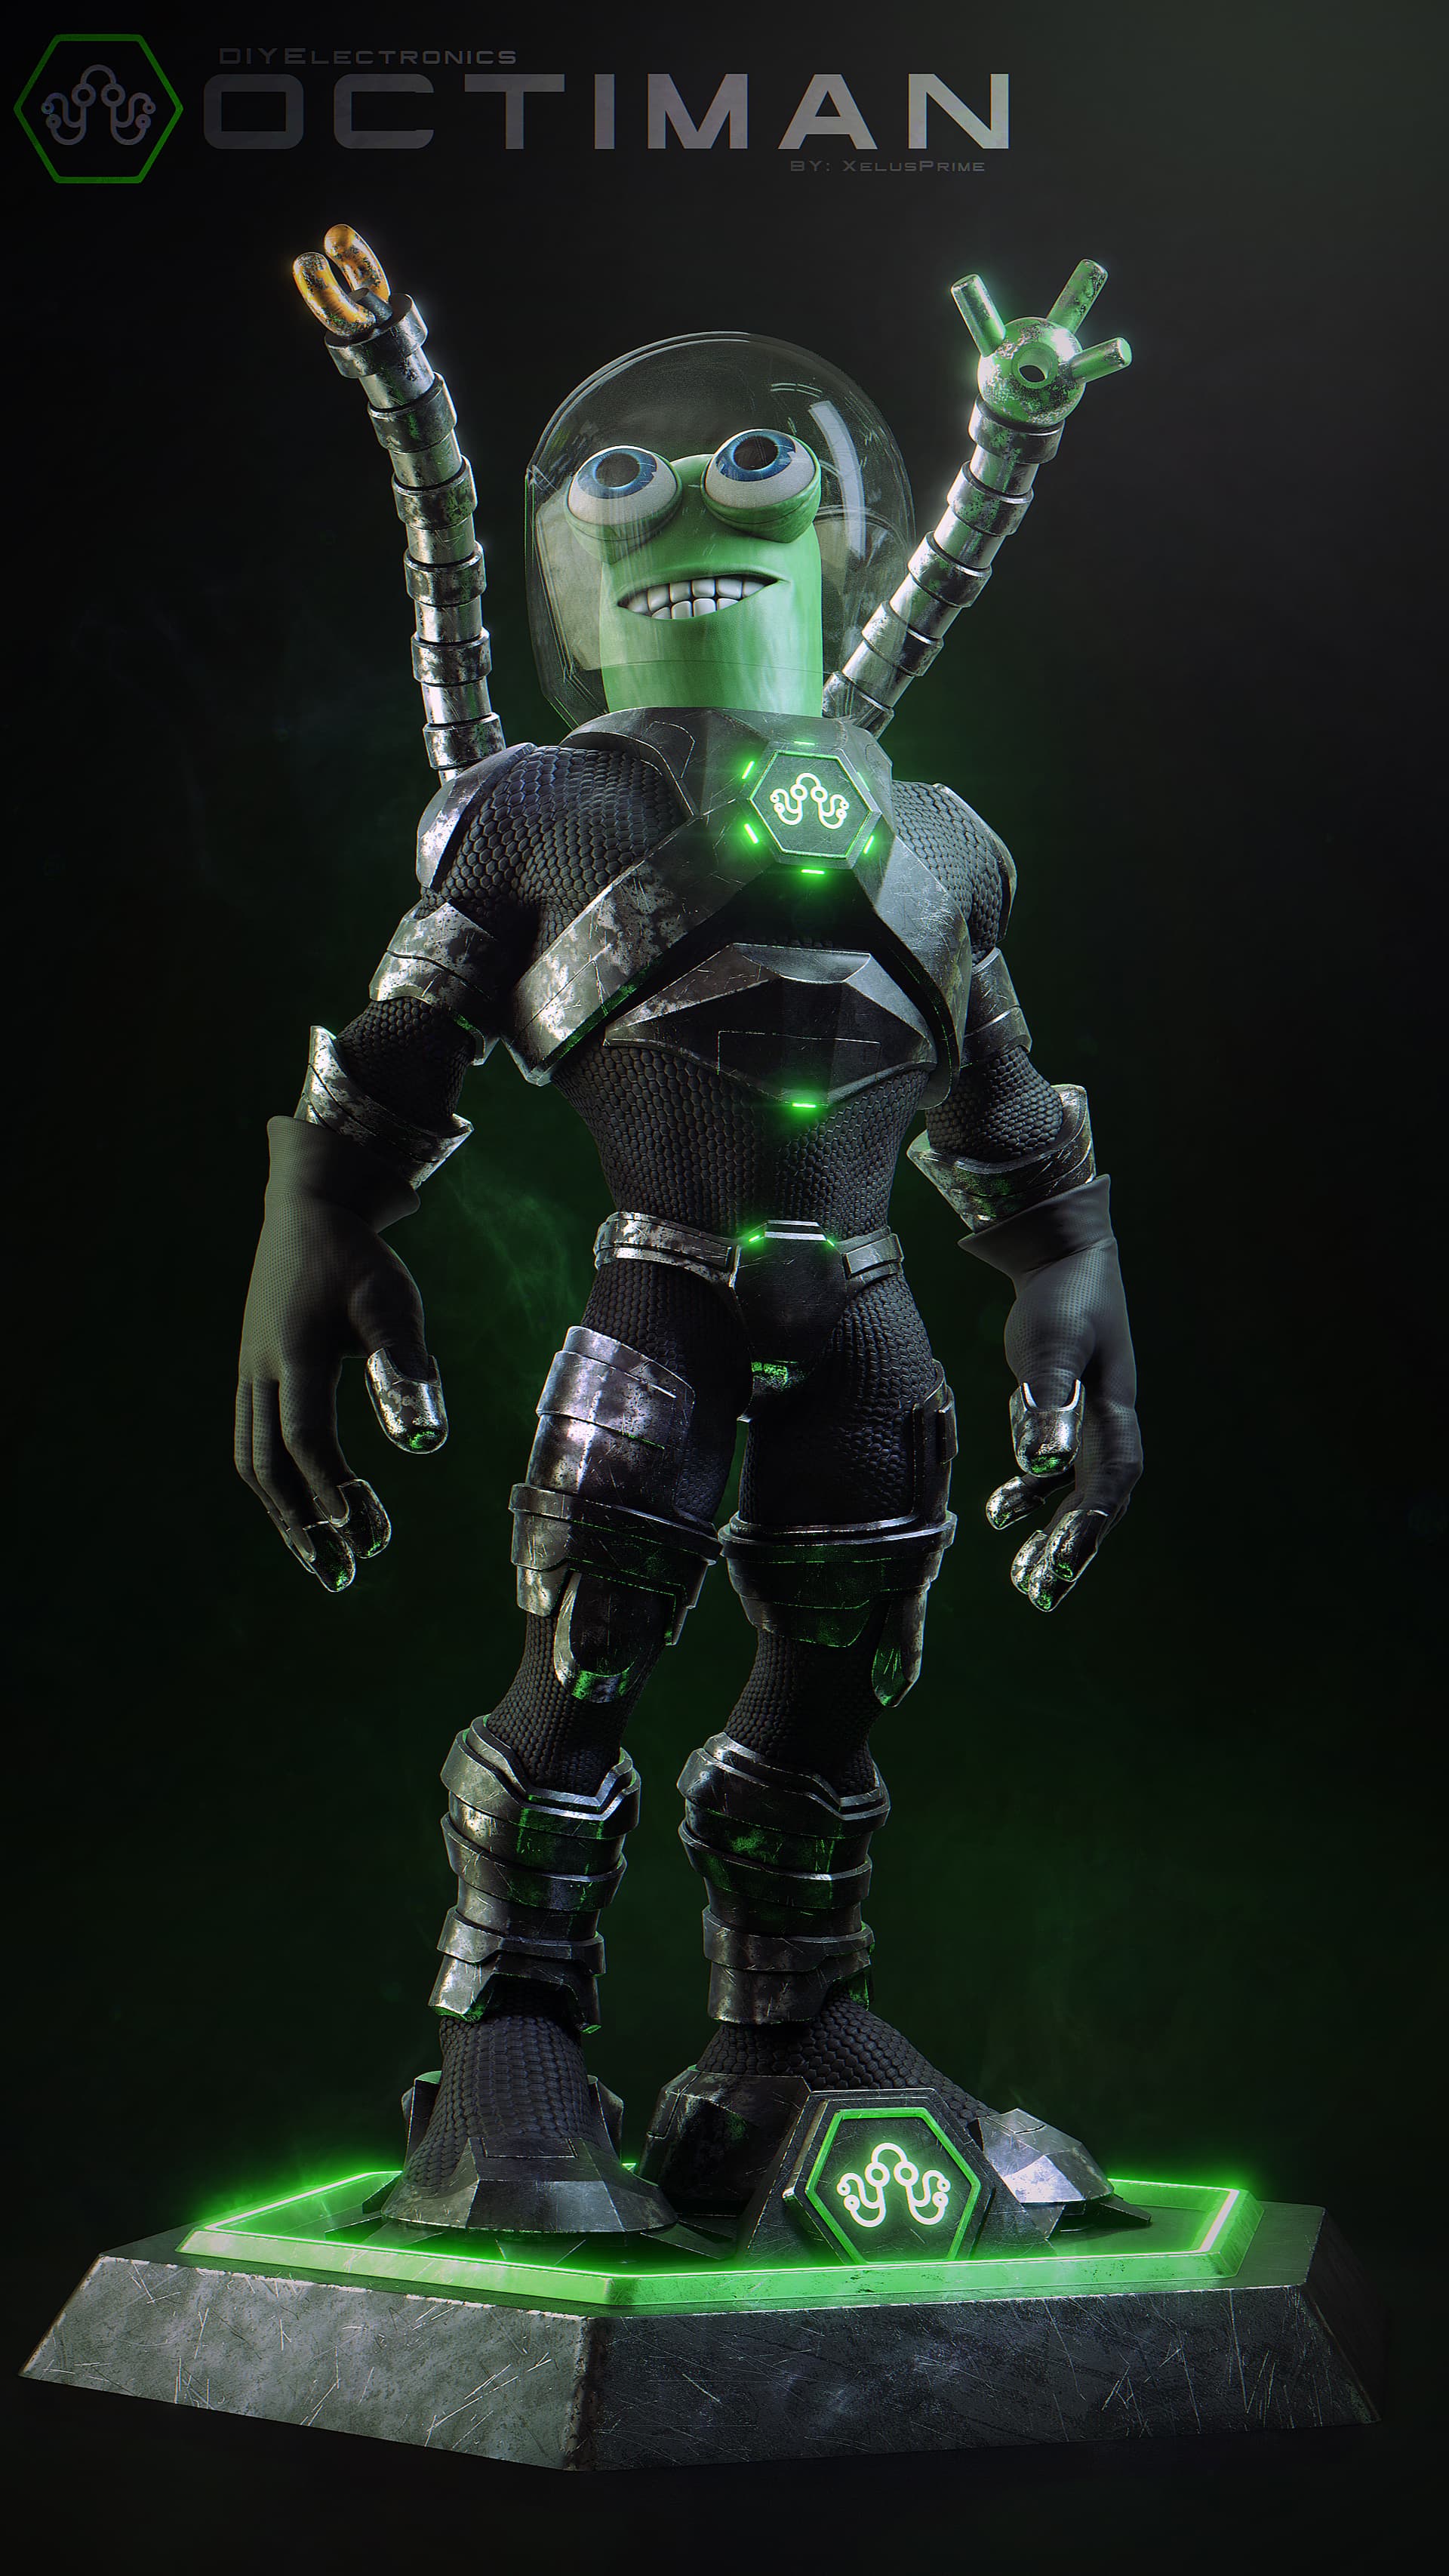
Octiman has been working out a bit…ok maybe a lot… Artistic Render
Also wanted to render an image of him more fitting of say a header or banner of a sort.
Traaaaalalaaaaaaaaa! Slightly different pose, but more heroic. Artistic Render
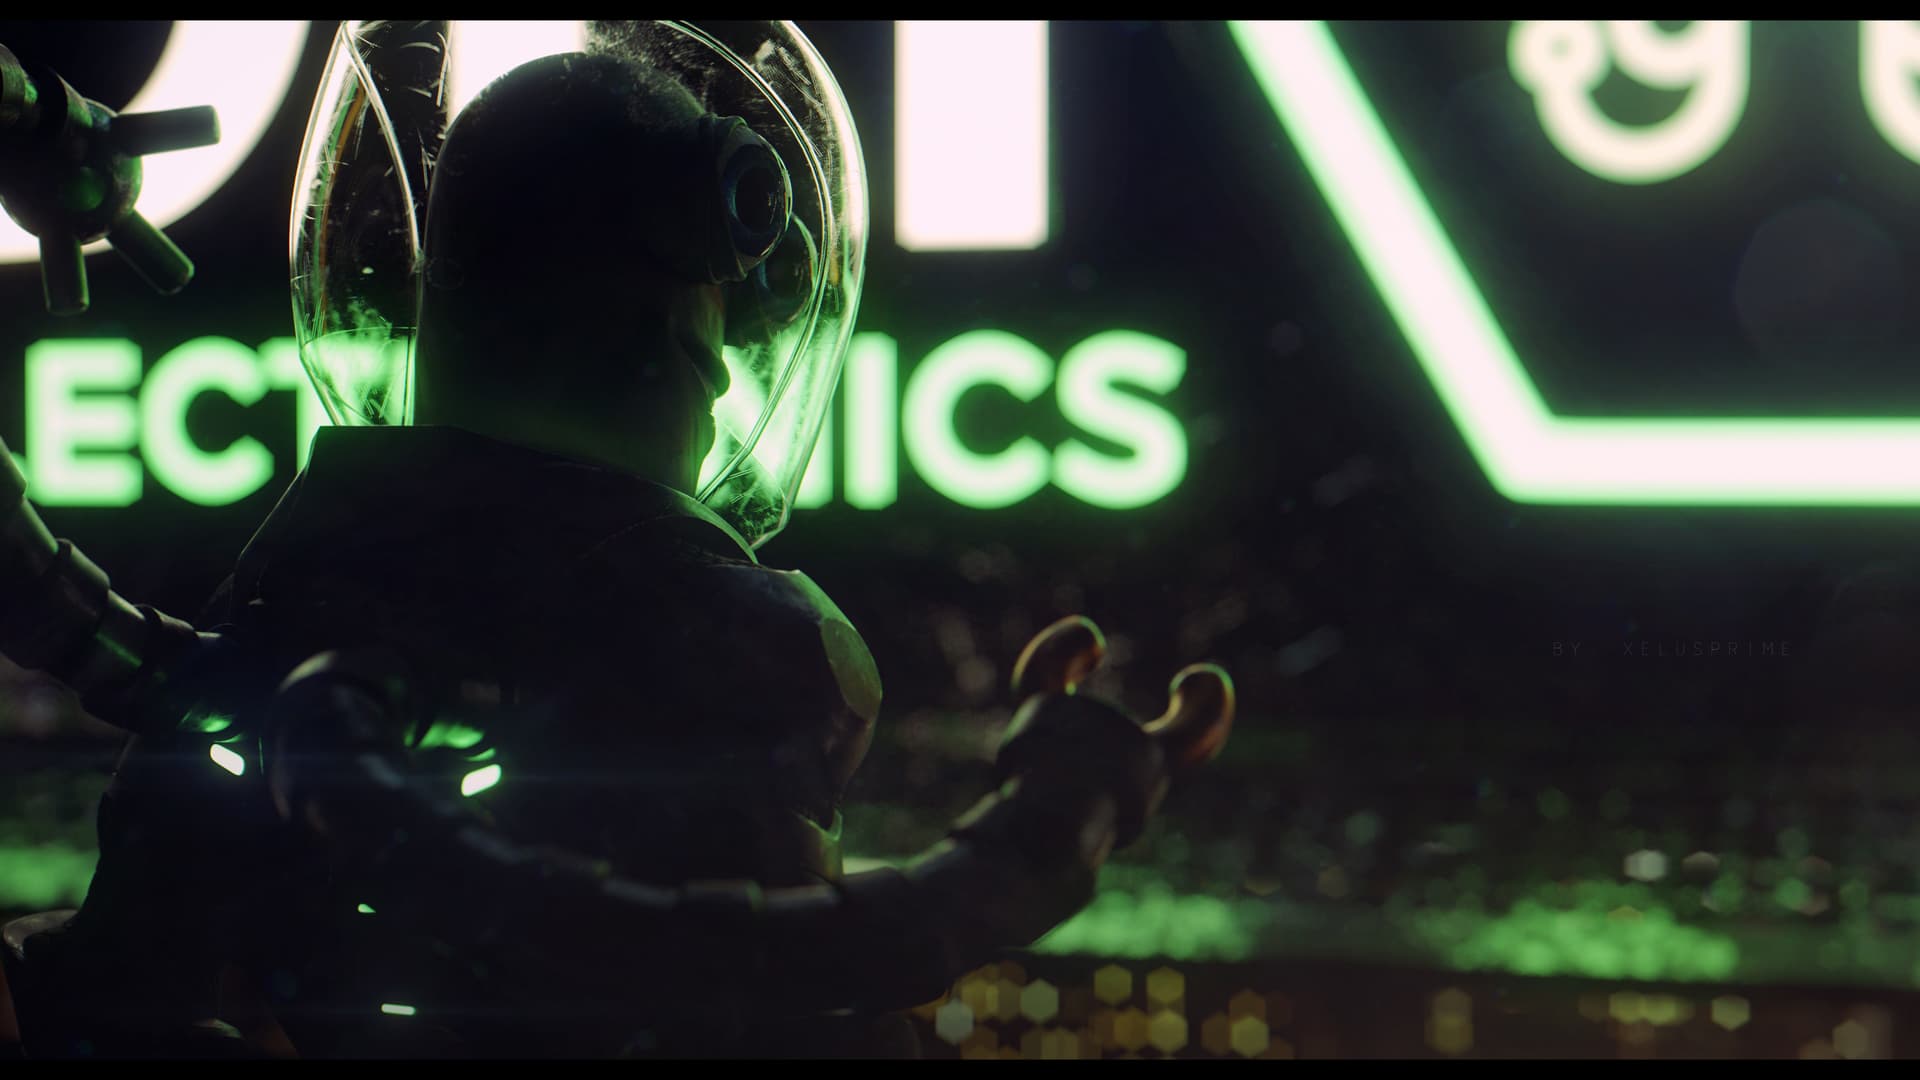
The final artistic render of Octiman had one simple factor, make him look epic if he didn’t already look cool. So a simple scene was built on the rooftop of a building, with the DIYE logo being on a billboard in the backdrop, casting light on Octiman, and being the only light source in the entire scene. Was originally intended to be the teaser image, but later decided against the idea of using it as one.
Here is the “I’m awesome and I know it” moment. Artistic Render
Hope you enjoyed reading through it all and seeing what goes on in my head, and what my graphics card has to put up with on a daily basis. Wanted to do a animation of him, but the render time alone would’ve killed me and my graphics card, so settle for the renders. ![]()
Thats it from me, may you have a wonderful day!