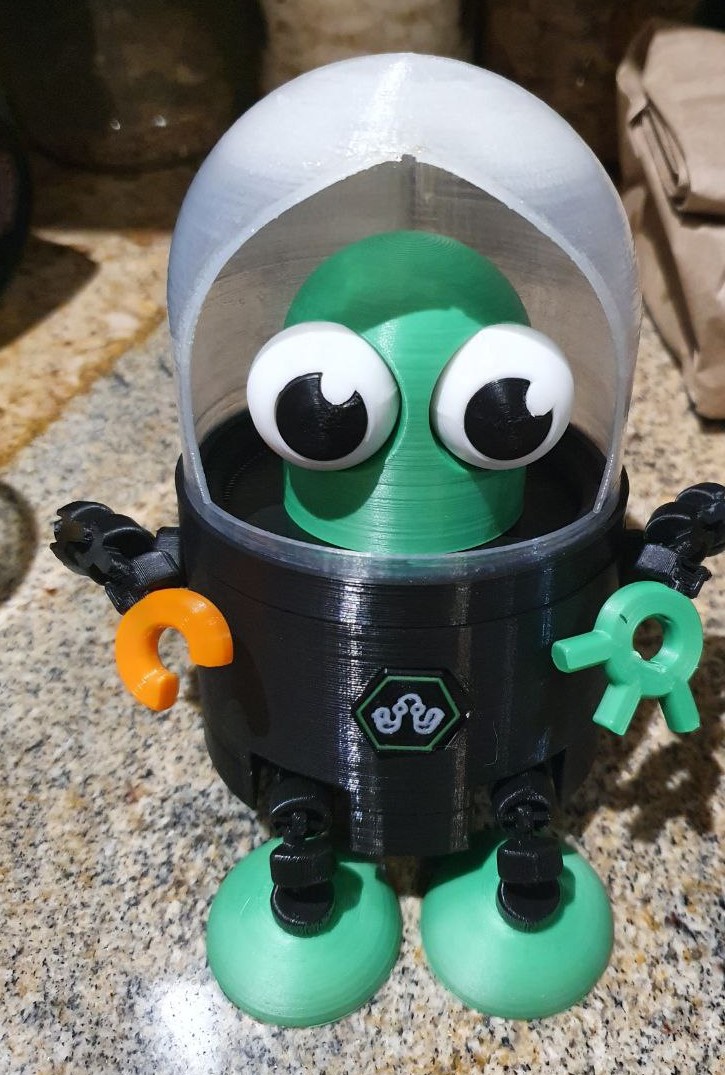
Hi I’m Cheryl. I wanted to make something that was easy to print while being fun and recognizable with a practical purpose. To make it easy to print it would have to be printable without any supports and on any entry level printer such as the Ender 3 and the like. Resin quality details would make printing difficult so simplicity was key.
I use Fusion 360 with the free hobbyist license.
All flexi parts had to be print-in-place as constructed flexi parts require machines with more accuracy and usually result in reprints from parts breaking during construction. This was my first time designing print-in-place flexi joints so I took this as an opportunity to learn with trial and error.
To get the most vibrant colours I decided it was best to design in parts that could be printed in different colours using only a single nozzle and a stock printer.
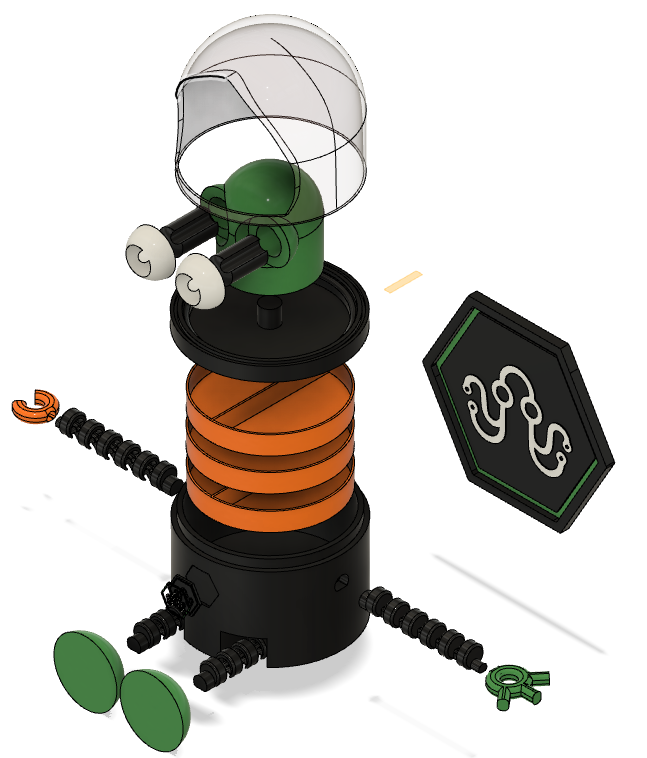
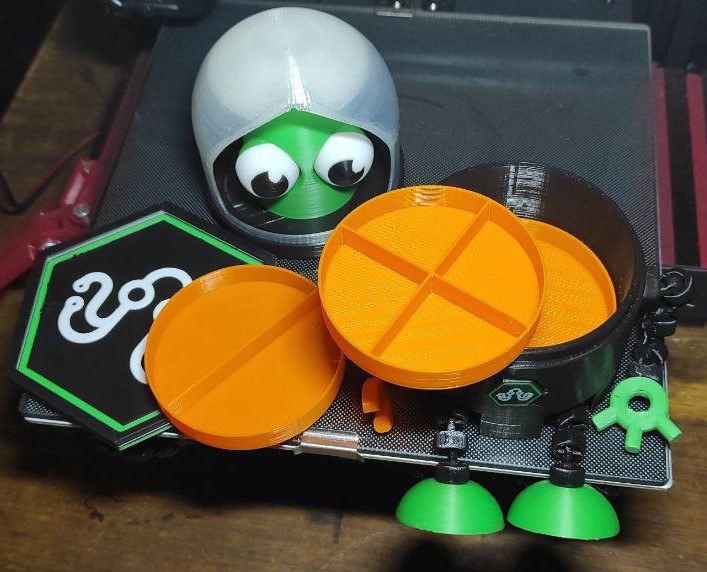
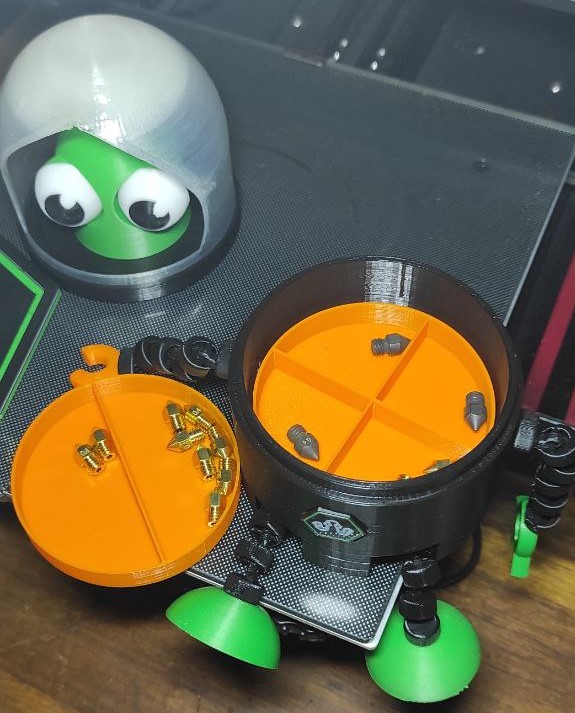
The result is the adorable multiple part Octiman below. His body and legs are printed as a single print and are the largest print of the lot. The legs and arms are print-in-place and flexi. The arms slot into the body. No supports are required for any of the parts.
His hands, feet, helmet, head, eyes and pupils are also printed separately and fricton fit.
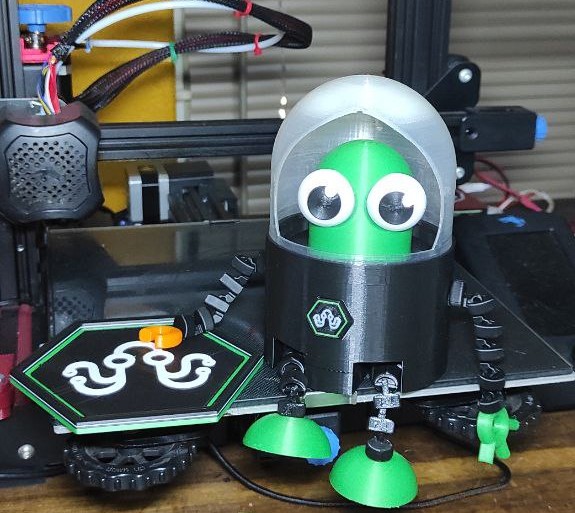
I designed a fun coaster as an add on just because you always need to fuel up while working on the printers or designs.
He also has the nice feature of being a storage box useful for keeping your nozzles or other small items like nuts and bolts safe and organised with space for three trays and 3 different options of trays to print.
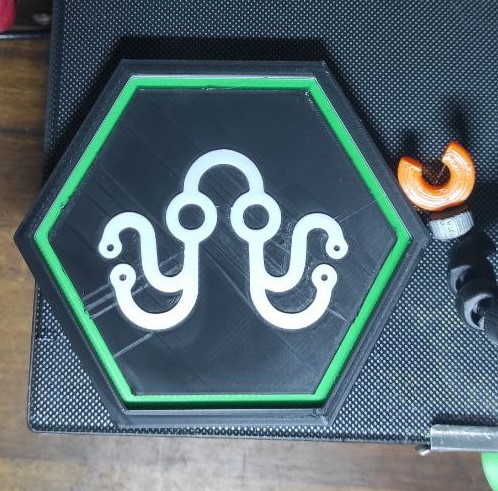
The logo on his chest is also a separate part printed using the z-hop method. Chep has a very good video here to explain the process for those who would like to try it: Smooth Two Color Inlay 3D Print Using Cura Z Hop on Creality Ender 3 - YouTube
The coaster is printed using filament changes at specific layers.
This design could have been done with one less filament change but I wanted octiman on the logo to stand out a bit instead of being pushed in.